

This guide takes an empty install to a published match. Each step depends on the one before it, so work through them in order the first time – after that you’ll rarely touch steps 1 and 2 again.
Came here from the Start Guide button on Football Leagues → Dashboard? Keep that tab open – its Your Data panel has a + Add button for each step. Competitions stays grayed out until you have a league and a season, and Matches until you have a competition and 2 clubs.
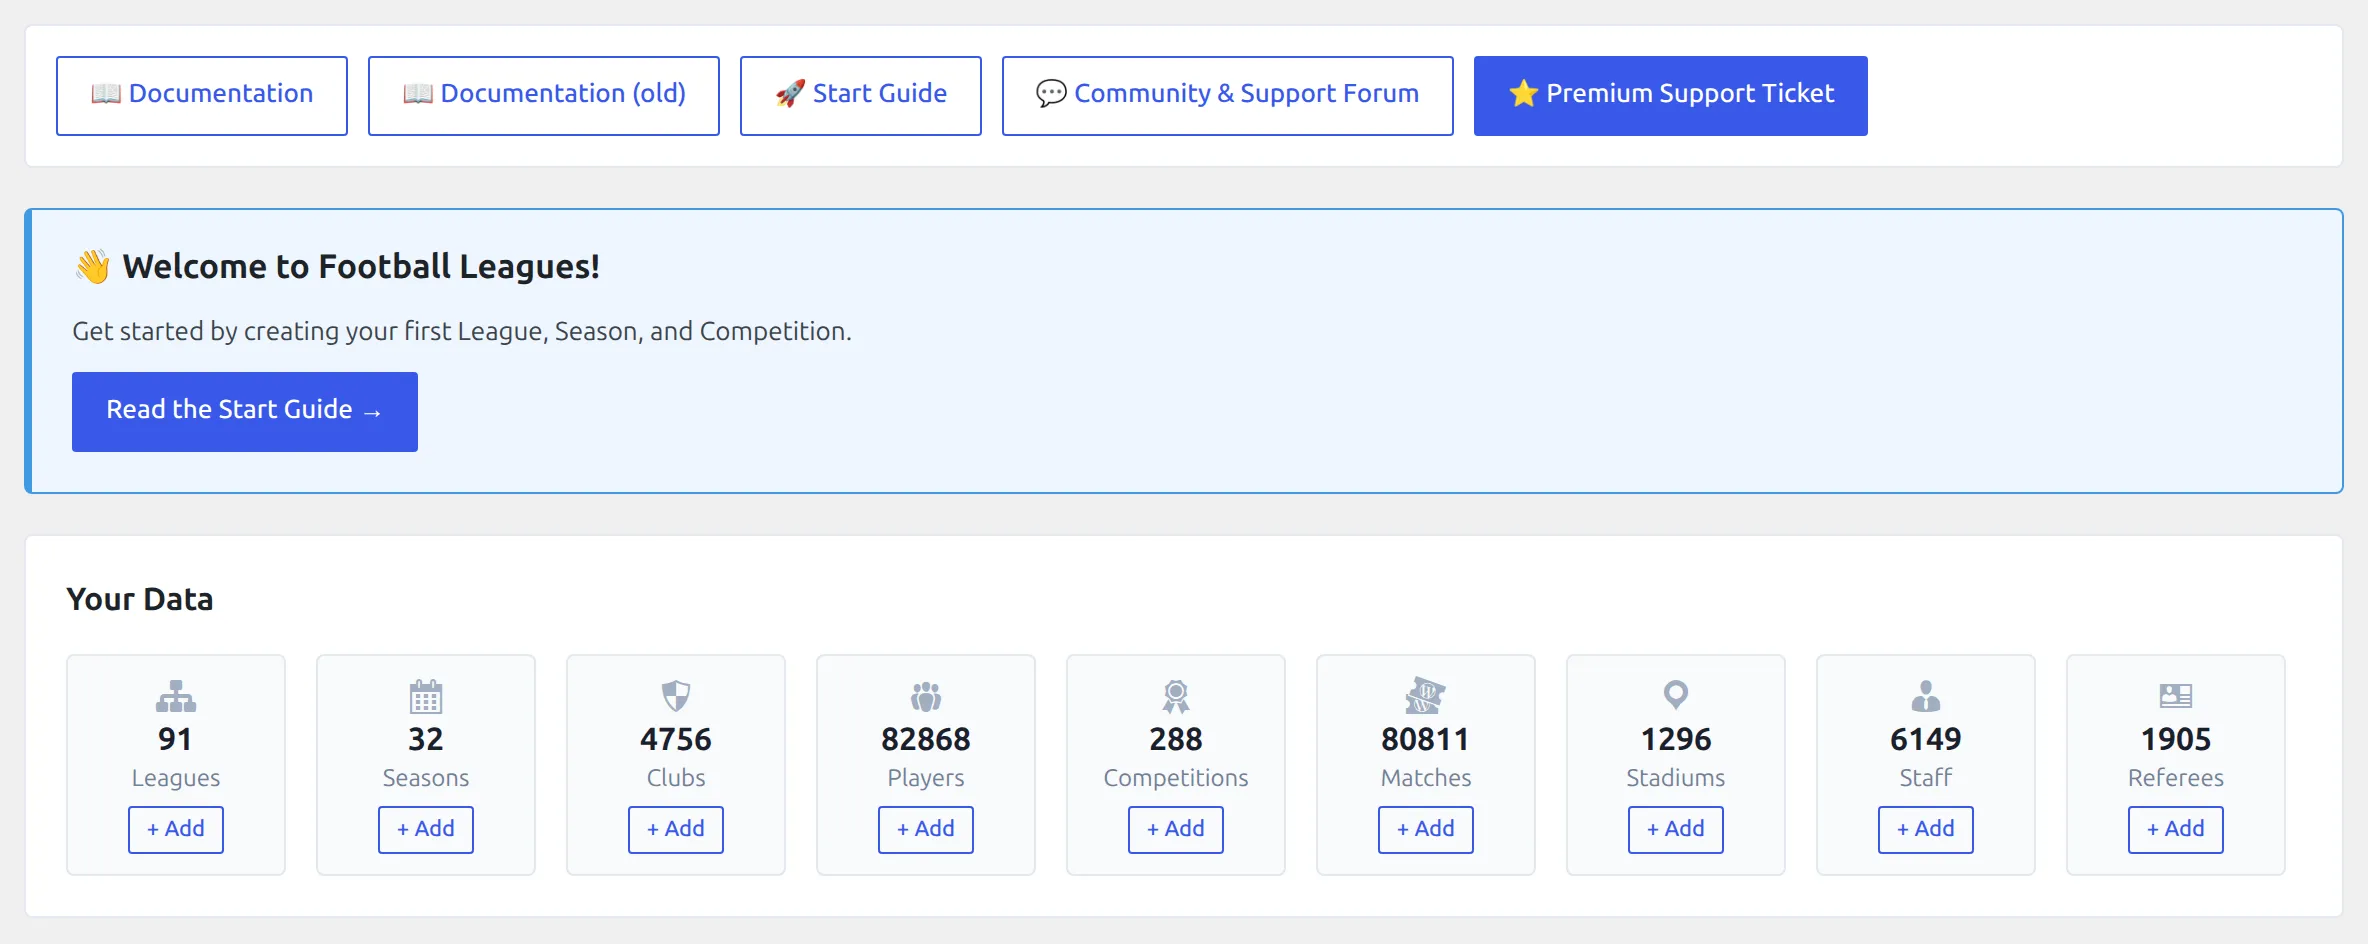
Football Leagues stores everything as WordPress content, spread across two admin menus. Clubs & People holds clubs, players, staff, referees and stadiums. Competitions holds competitions, matches, standing tables, leagues and seasons.
Before you start, make sure the plugin and the free CMB2 plugin are both active. CMB2 isn’t bundled, and the player editor is built with it. See Installation.
🚀 Step 1. Create a league and a season
Leagues and seasons are taxonomies, and every competition needs one of each. Create them first.
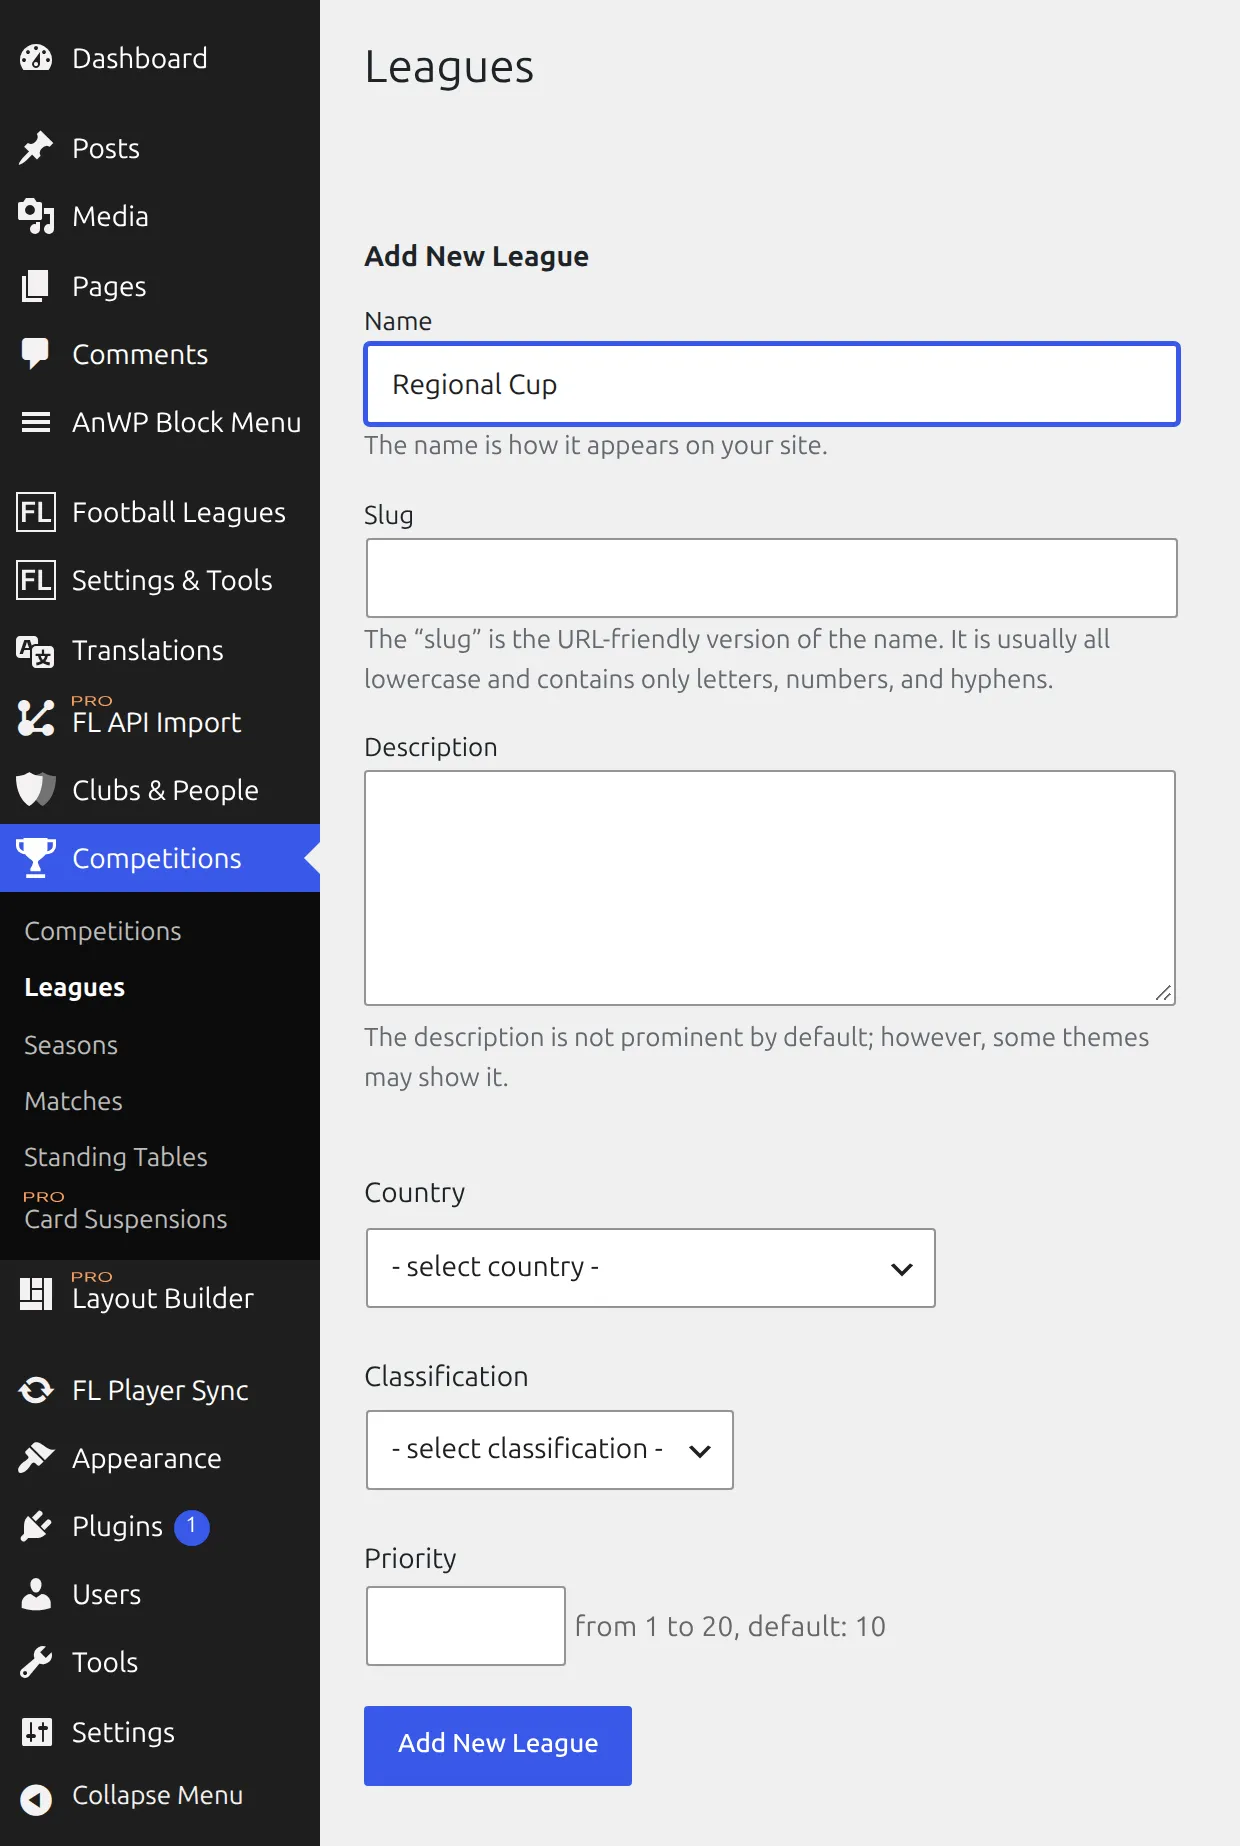
- Go to Competitions → Leagues, type a name – “Premier League”, “Regional Cup”, whatever you’re covering – and click Add New League.
- Go to Competitions → Seasons and do the same with Add New Season.
Name seasons consistently
Use 2025 or 2025-2026 and stick to one shape. Season names are sorted as text, so a consistent format is what keeps them in chronological order.
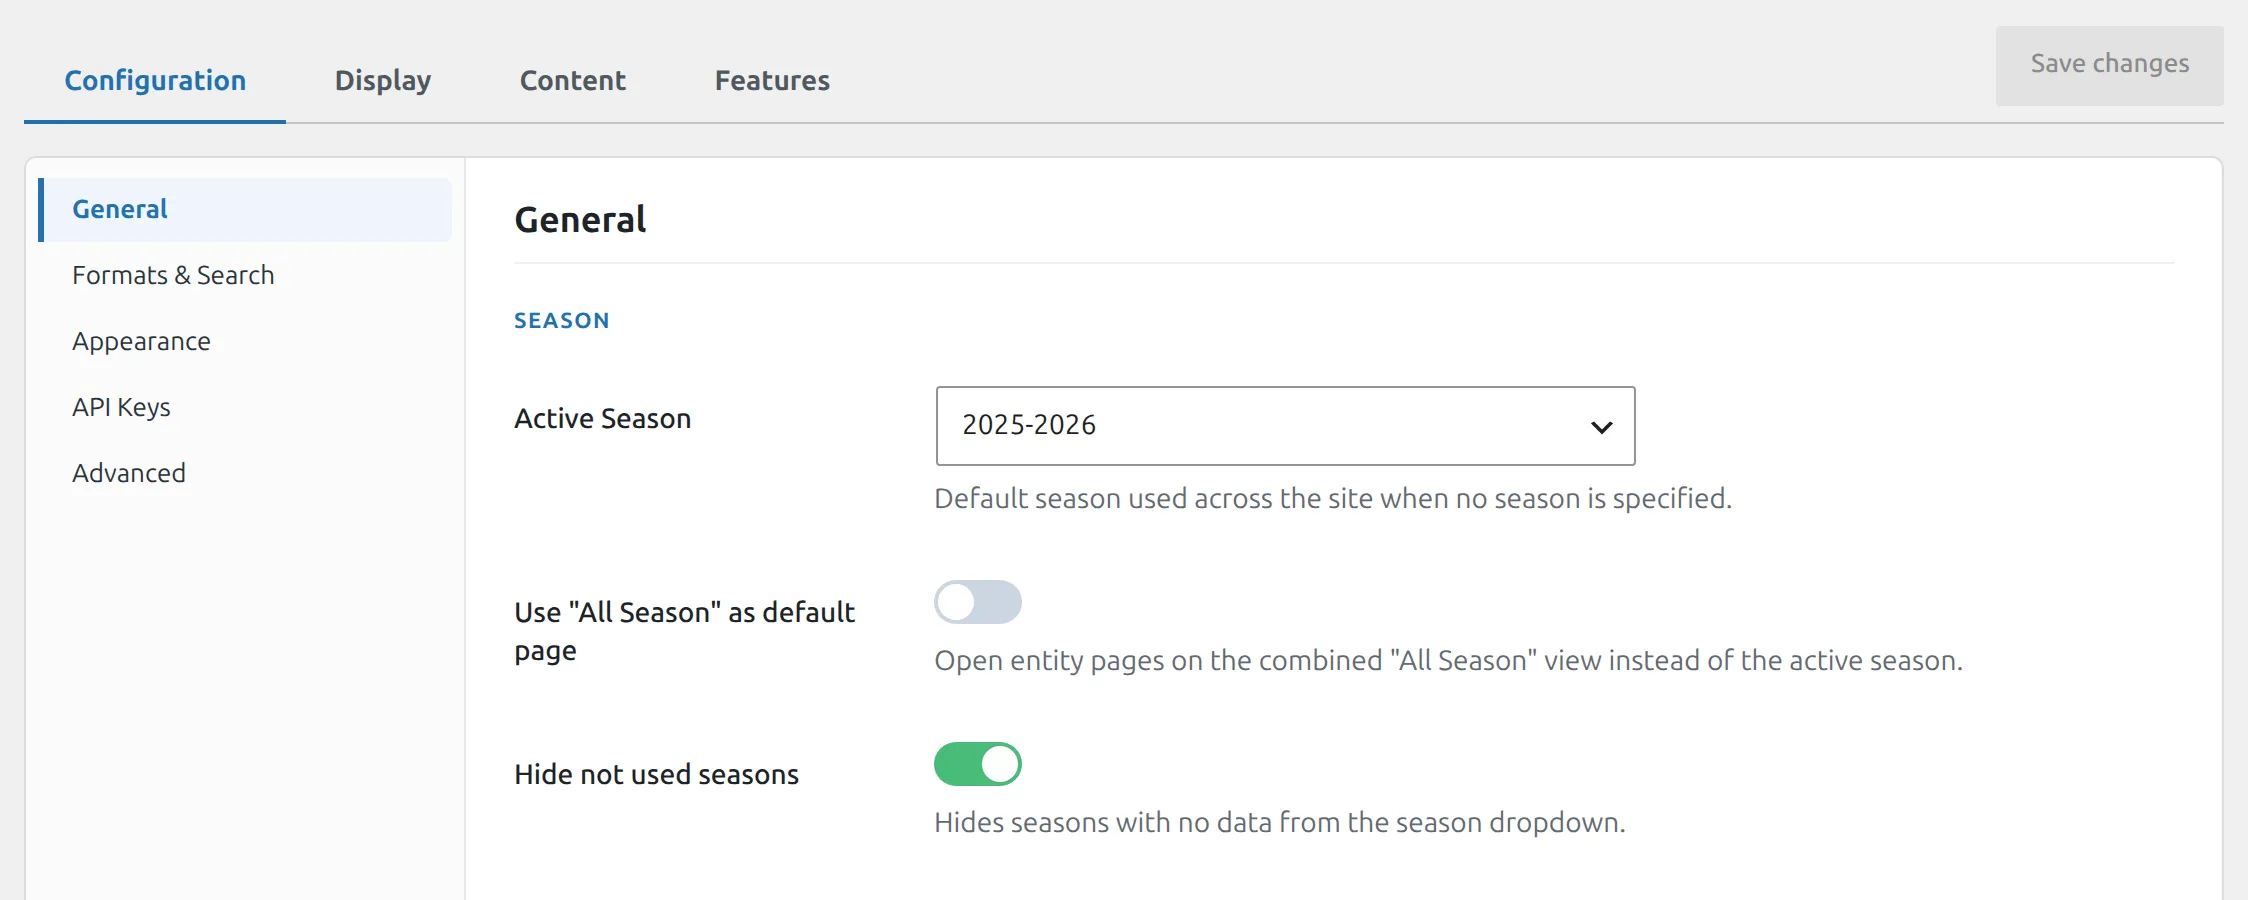
The site’s default season lives at Settings & Tools → Settings → Configuration → General → Season → Active Season. That’s the season used everywhere you don’t name one explicitly. Your first season is set as the Active Season automatically when you create it, so come back here when you move on to a new season.
Step 2. Create your clubs
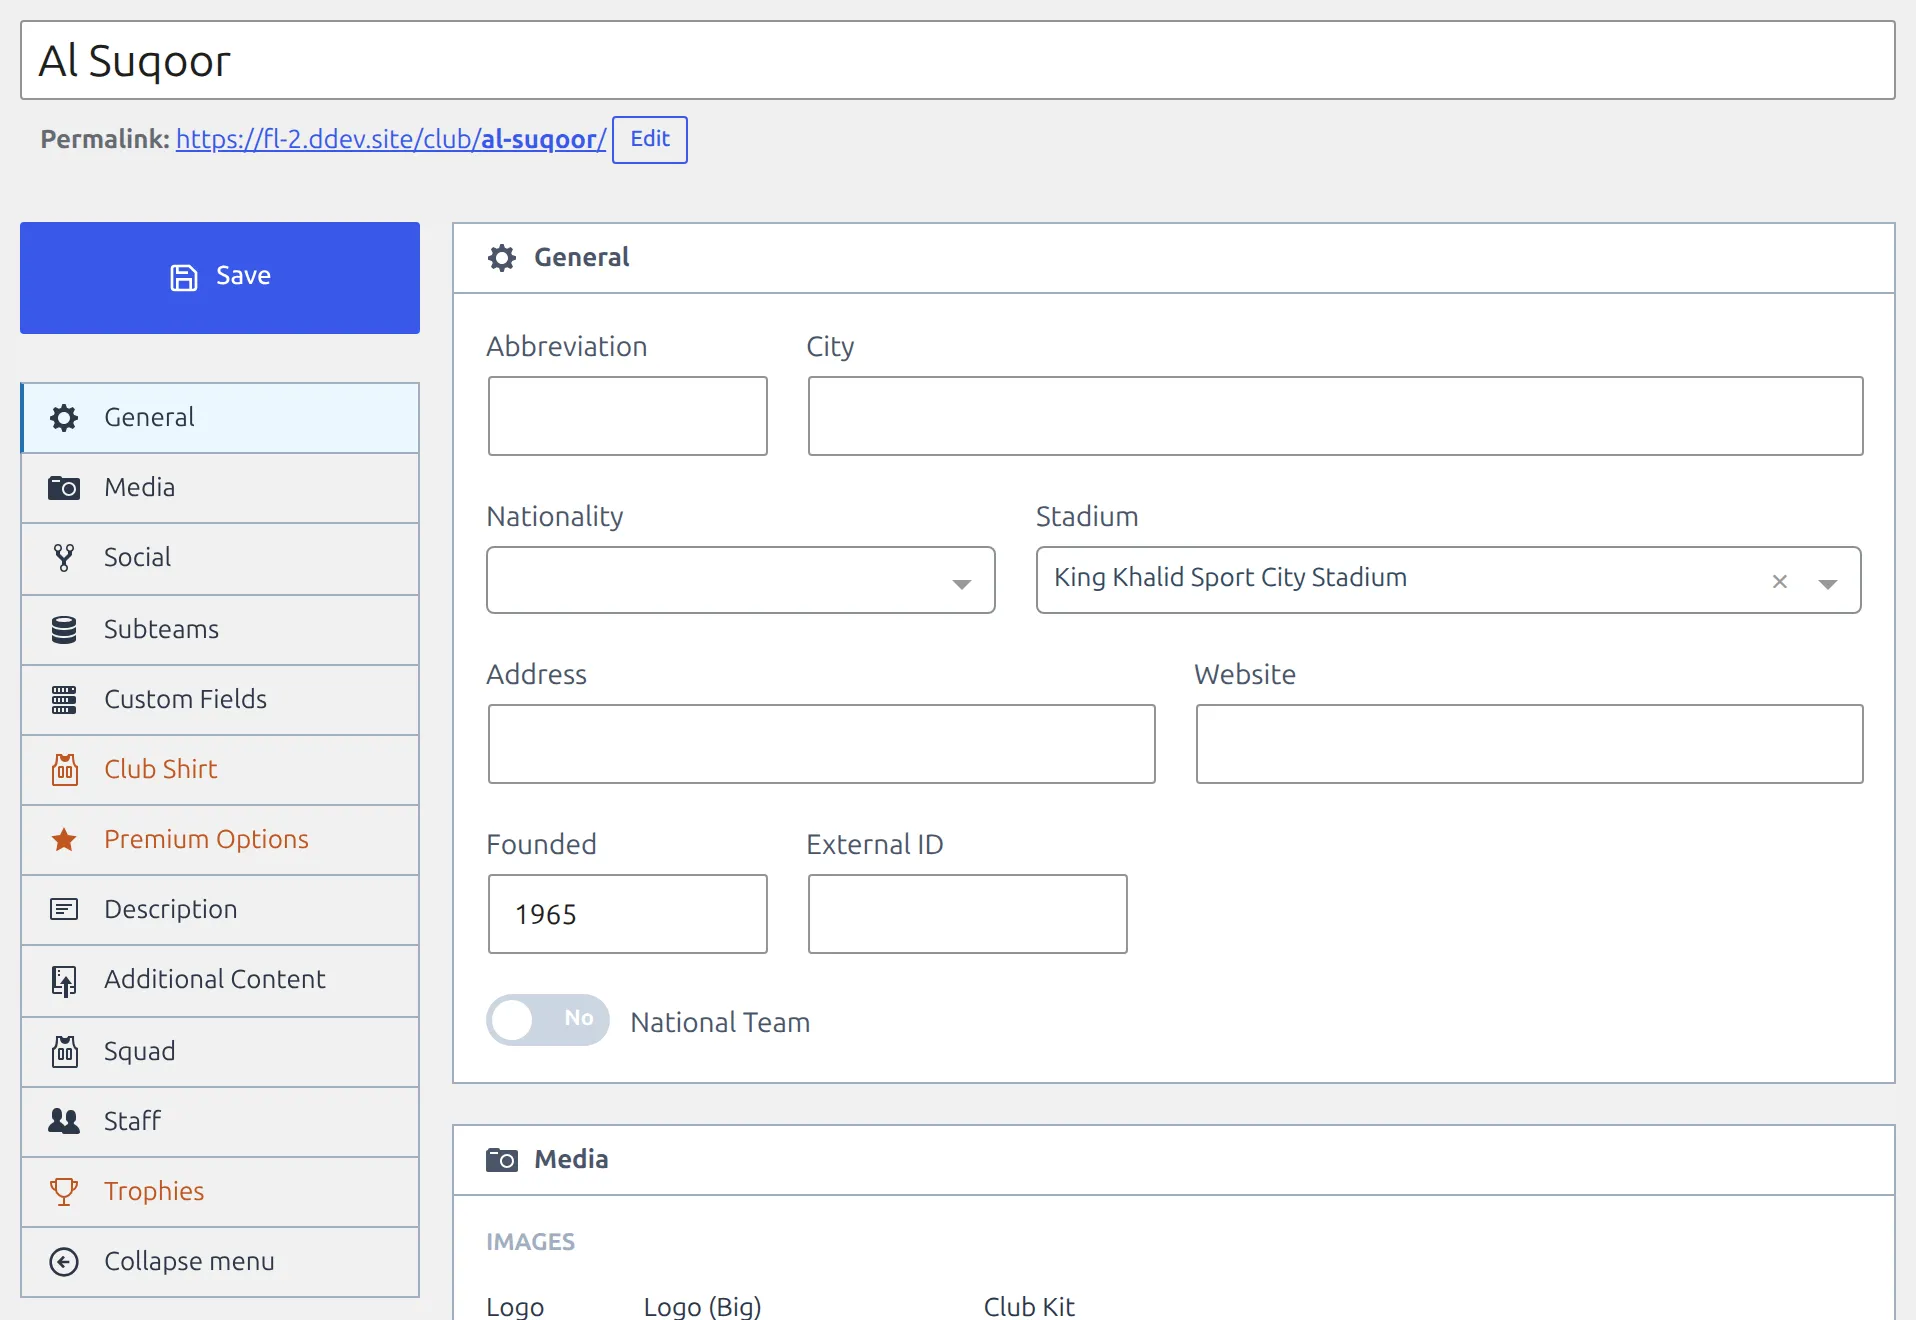
Go to Clubs & People → Clubs and click Add New Club once per team. A title is enough to get going. Logos, colors and details live in the sections of the left sidebar, and you can come back for them later.
Creating a lot of clubs? Settings & Tools → Data Import takes a pasted list instead – see Data Import Tool. The same tool handles players.
Step 3. Create the competition
Go to Competitions → Competitions, click Add New Competition and give it a title. Everything else happens in the Competition Stages box.
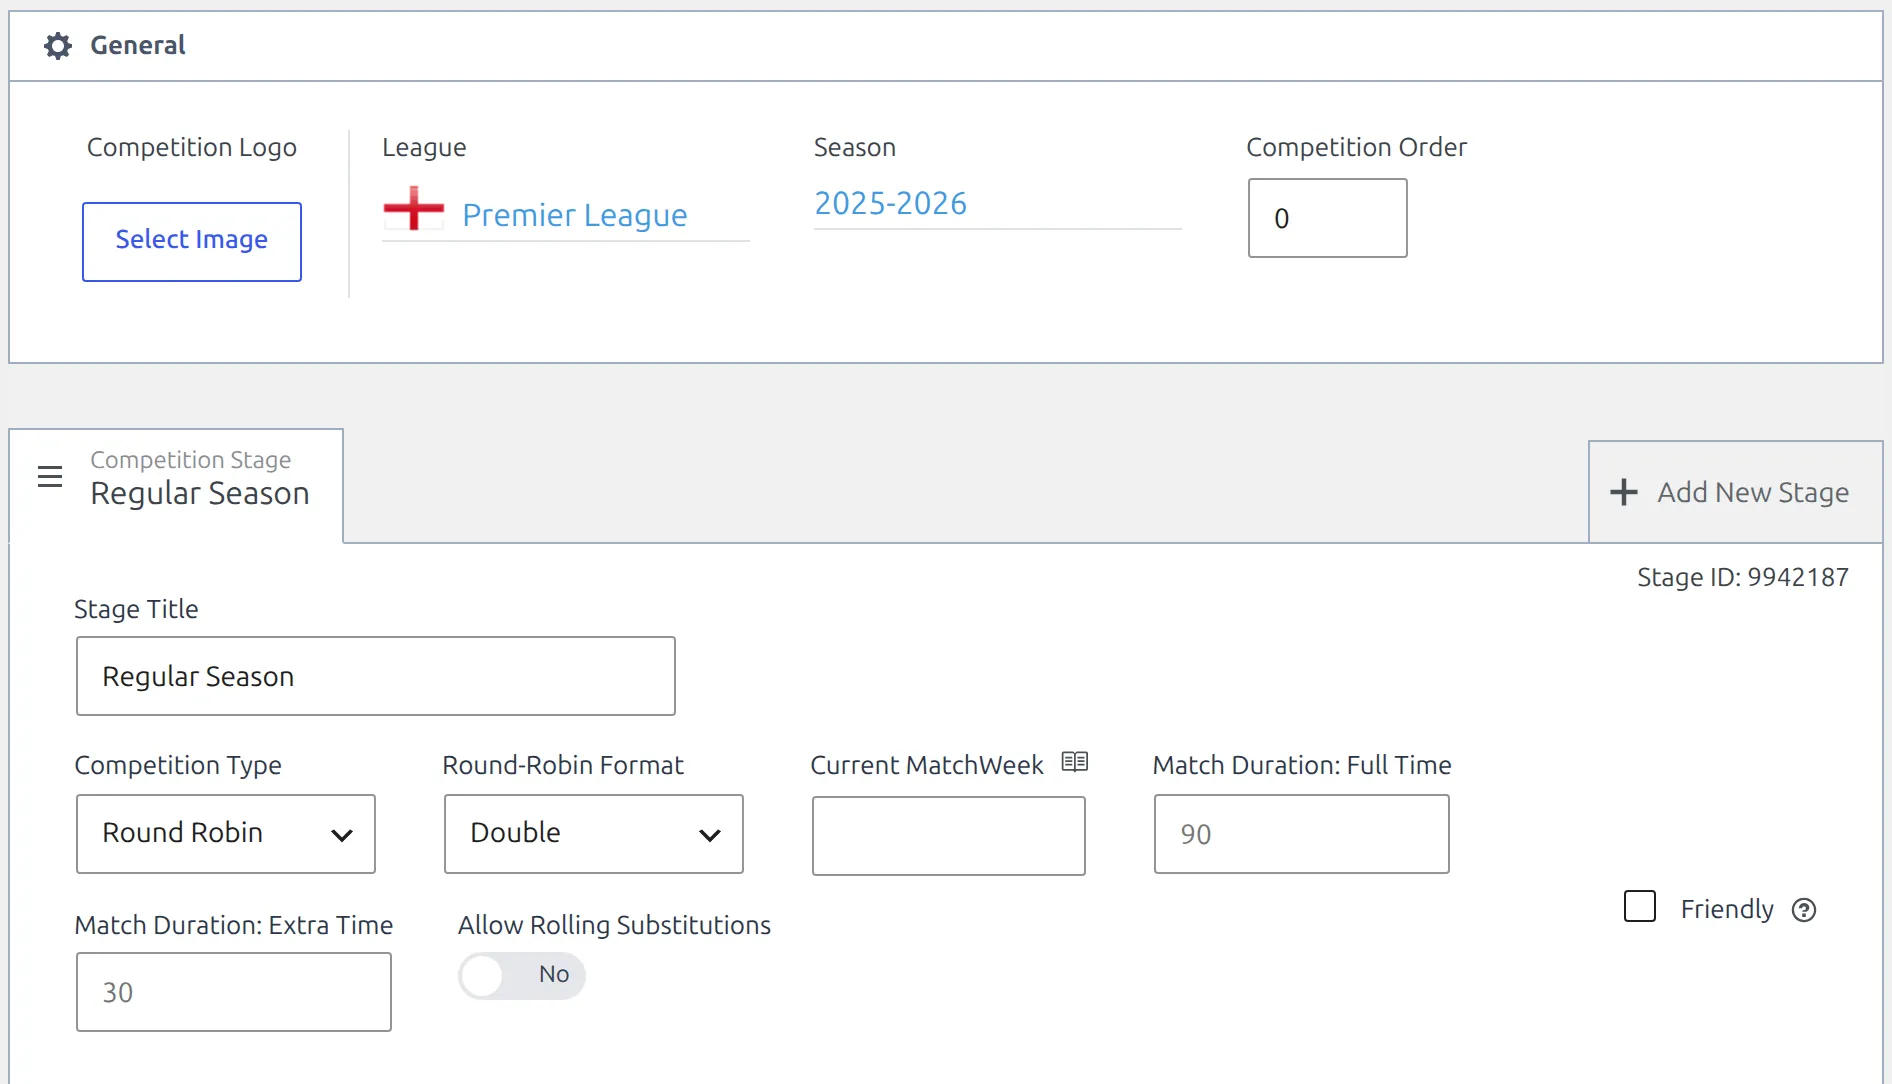
The General section at the top holds the settings that belong to the competition as a whole: Competition Logo, League, Season and Competition Order. Click the League or Season value to pick one. Forgot one in step 1? Both pickers have a Create New League / Create New Season button.
Below it is a tab strip. A new competition starts with one stage called Regular Season. Its panel holds:
- Stage Title – what this phase is called.
- Competition Type – Round Robin (everyone plays everyone) or Knockout (winners advance).
- Round-Robin Format – Single, Double or Custom. Replaced by Knockout Format (single-leg ties or two-legged ties) when the type is Knockout.
- Friendly – tick it and player statistics are not calculated for this stage.
Add groups and assign clubs
Click Add New Group/Match-up to create a group. In a knockout stage the same button creates a match-up – a tie is just a group with two clubs in it. Knockout stages also get an Add New Round button.
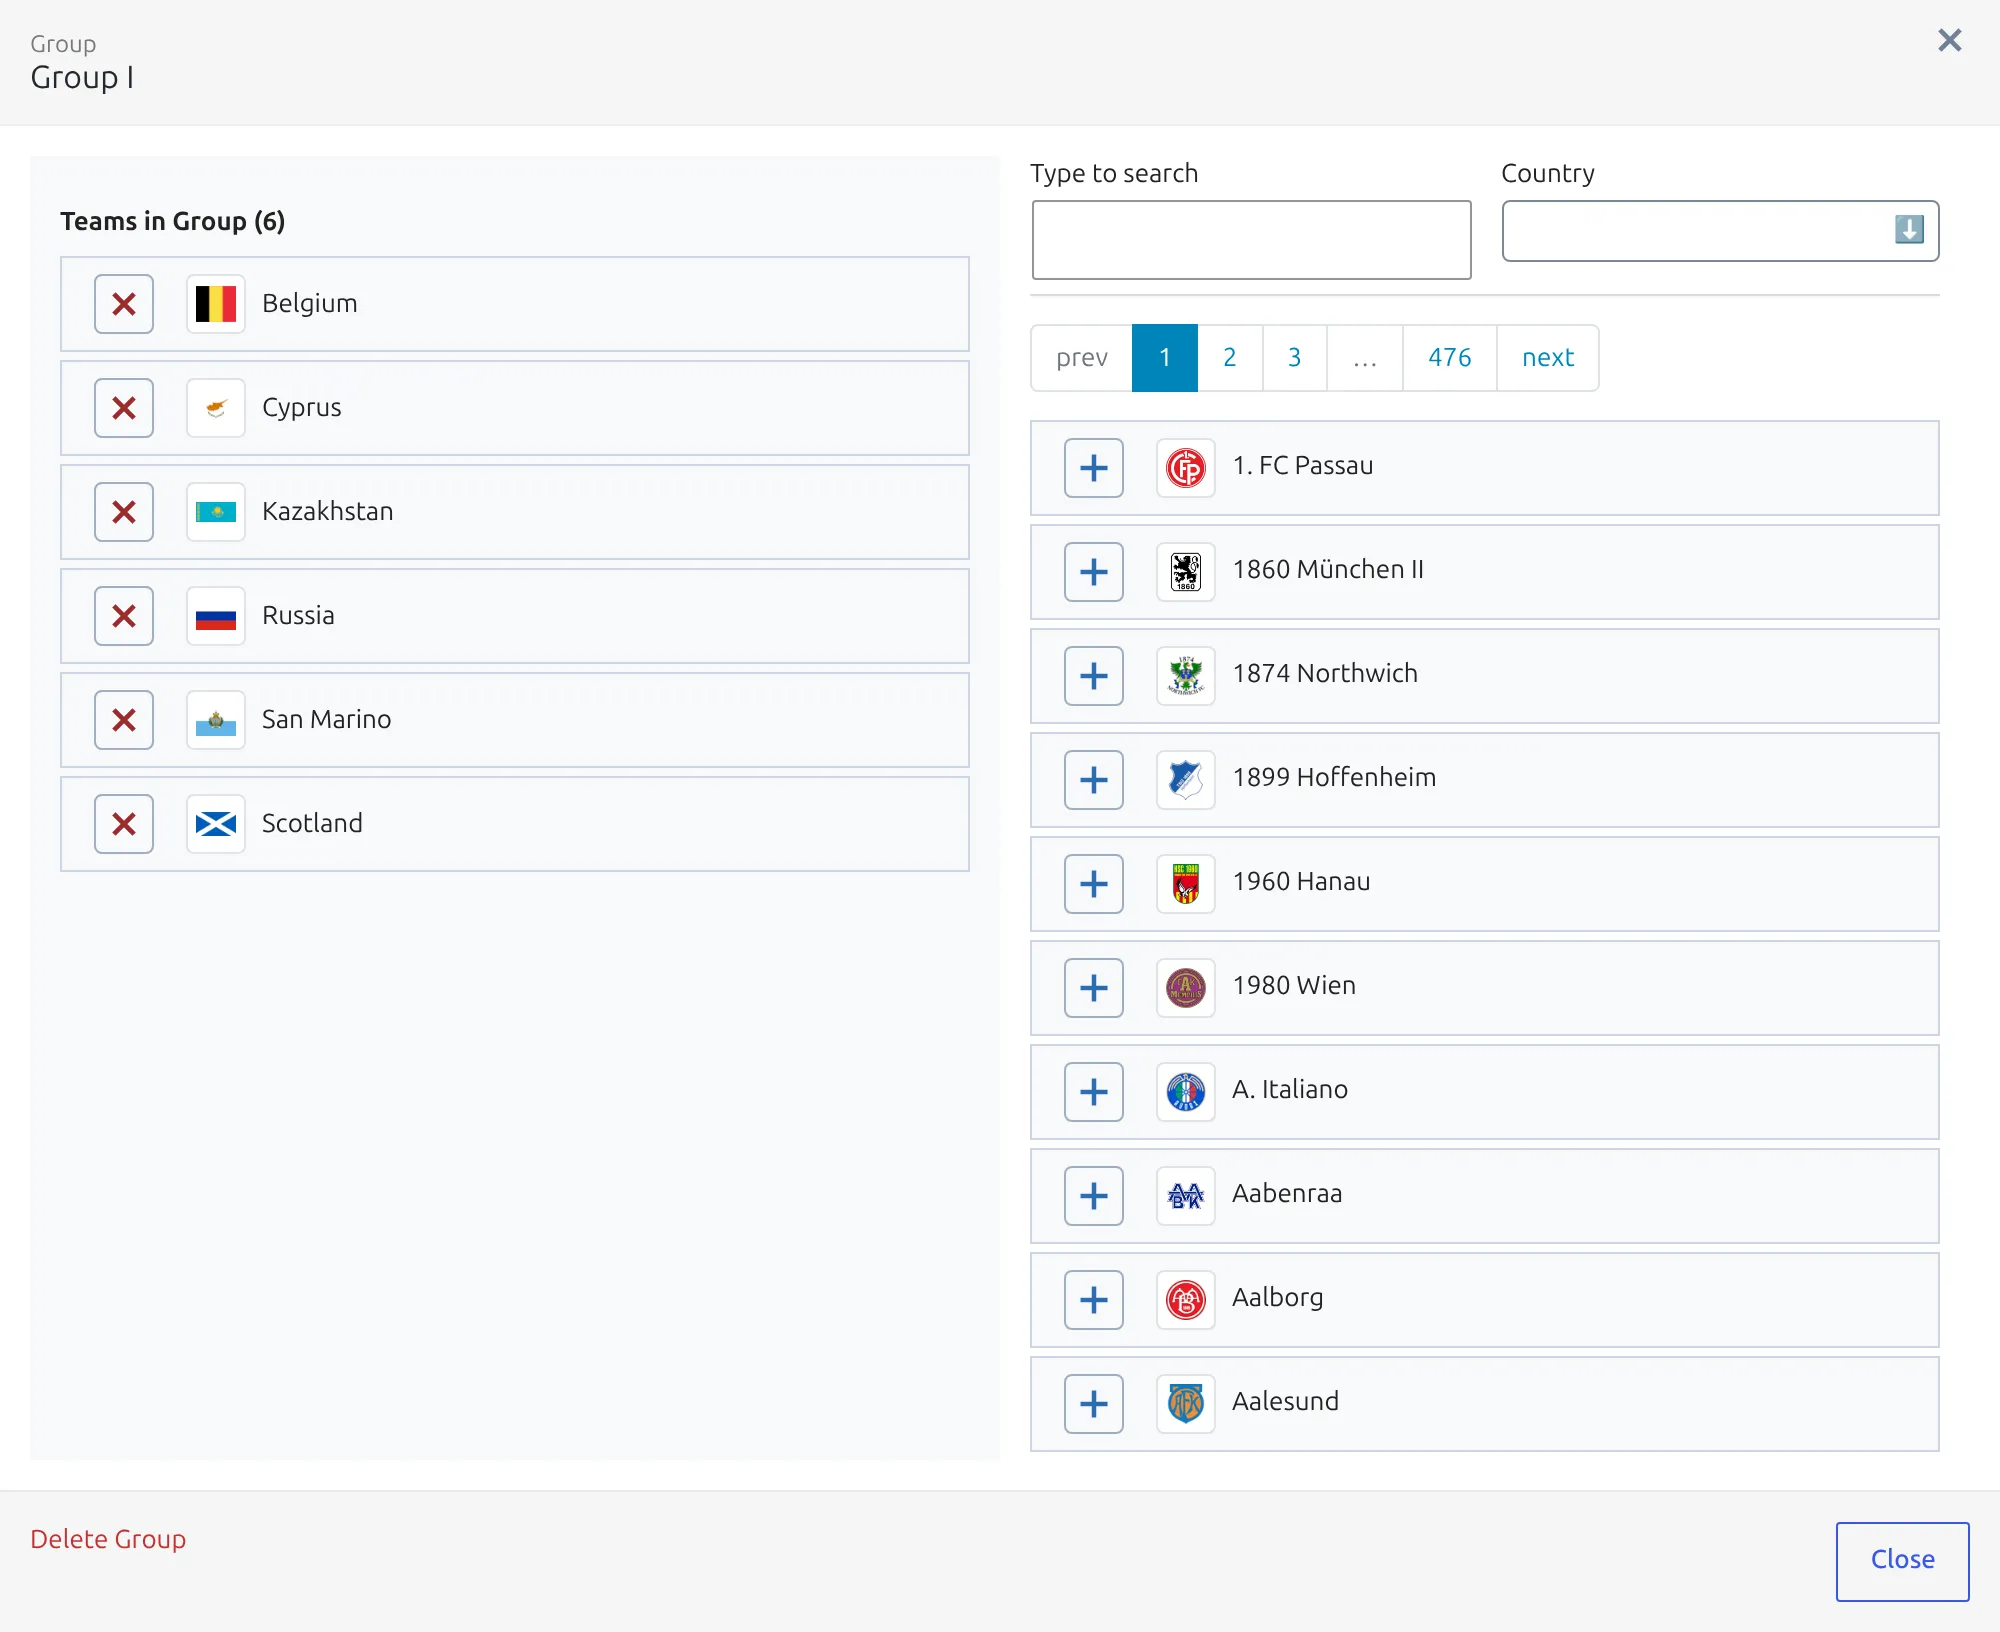
To put clubs in a group, click the gear icon on the right of the group’s header row. It has no label – it’s the last thing on that row.

The panel that opens is headed Group, or Match-up in a knockout stage. Search or filter by country, click + next to each club, then click Close – the modal has no save button of its own. Nothing is written to the database until you press Save.
A knockout match-up holds two clubs
Once a knockout match-up has two clubs the picker is replaced by a notice and you can’t add a third. If you need more teams in one group, switch the stage to Round Robin.
Press Save when the structure looks right. Need more than one phase – a group stage followed by play-offs? Use Add New Stage; that’s covered in Competition: Multistage.
Step 4. Create the standing table
Round-robin stages need a standing table – it isn’t created for you. Knockout stages don’t use one; skip to step 5.
- Go to Competitions → Standing Tables → Add New Standing Table.
- Give it a title.
- Under Select Competition Group, pick the Competition and the Group.
- Click Save & Continue.
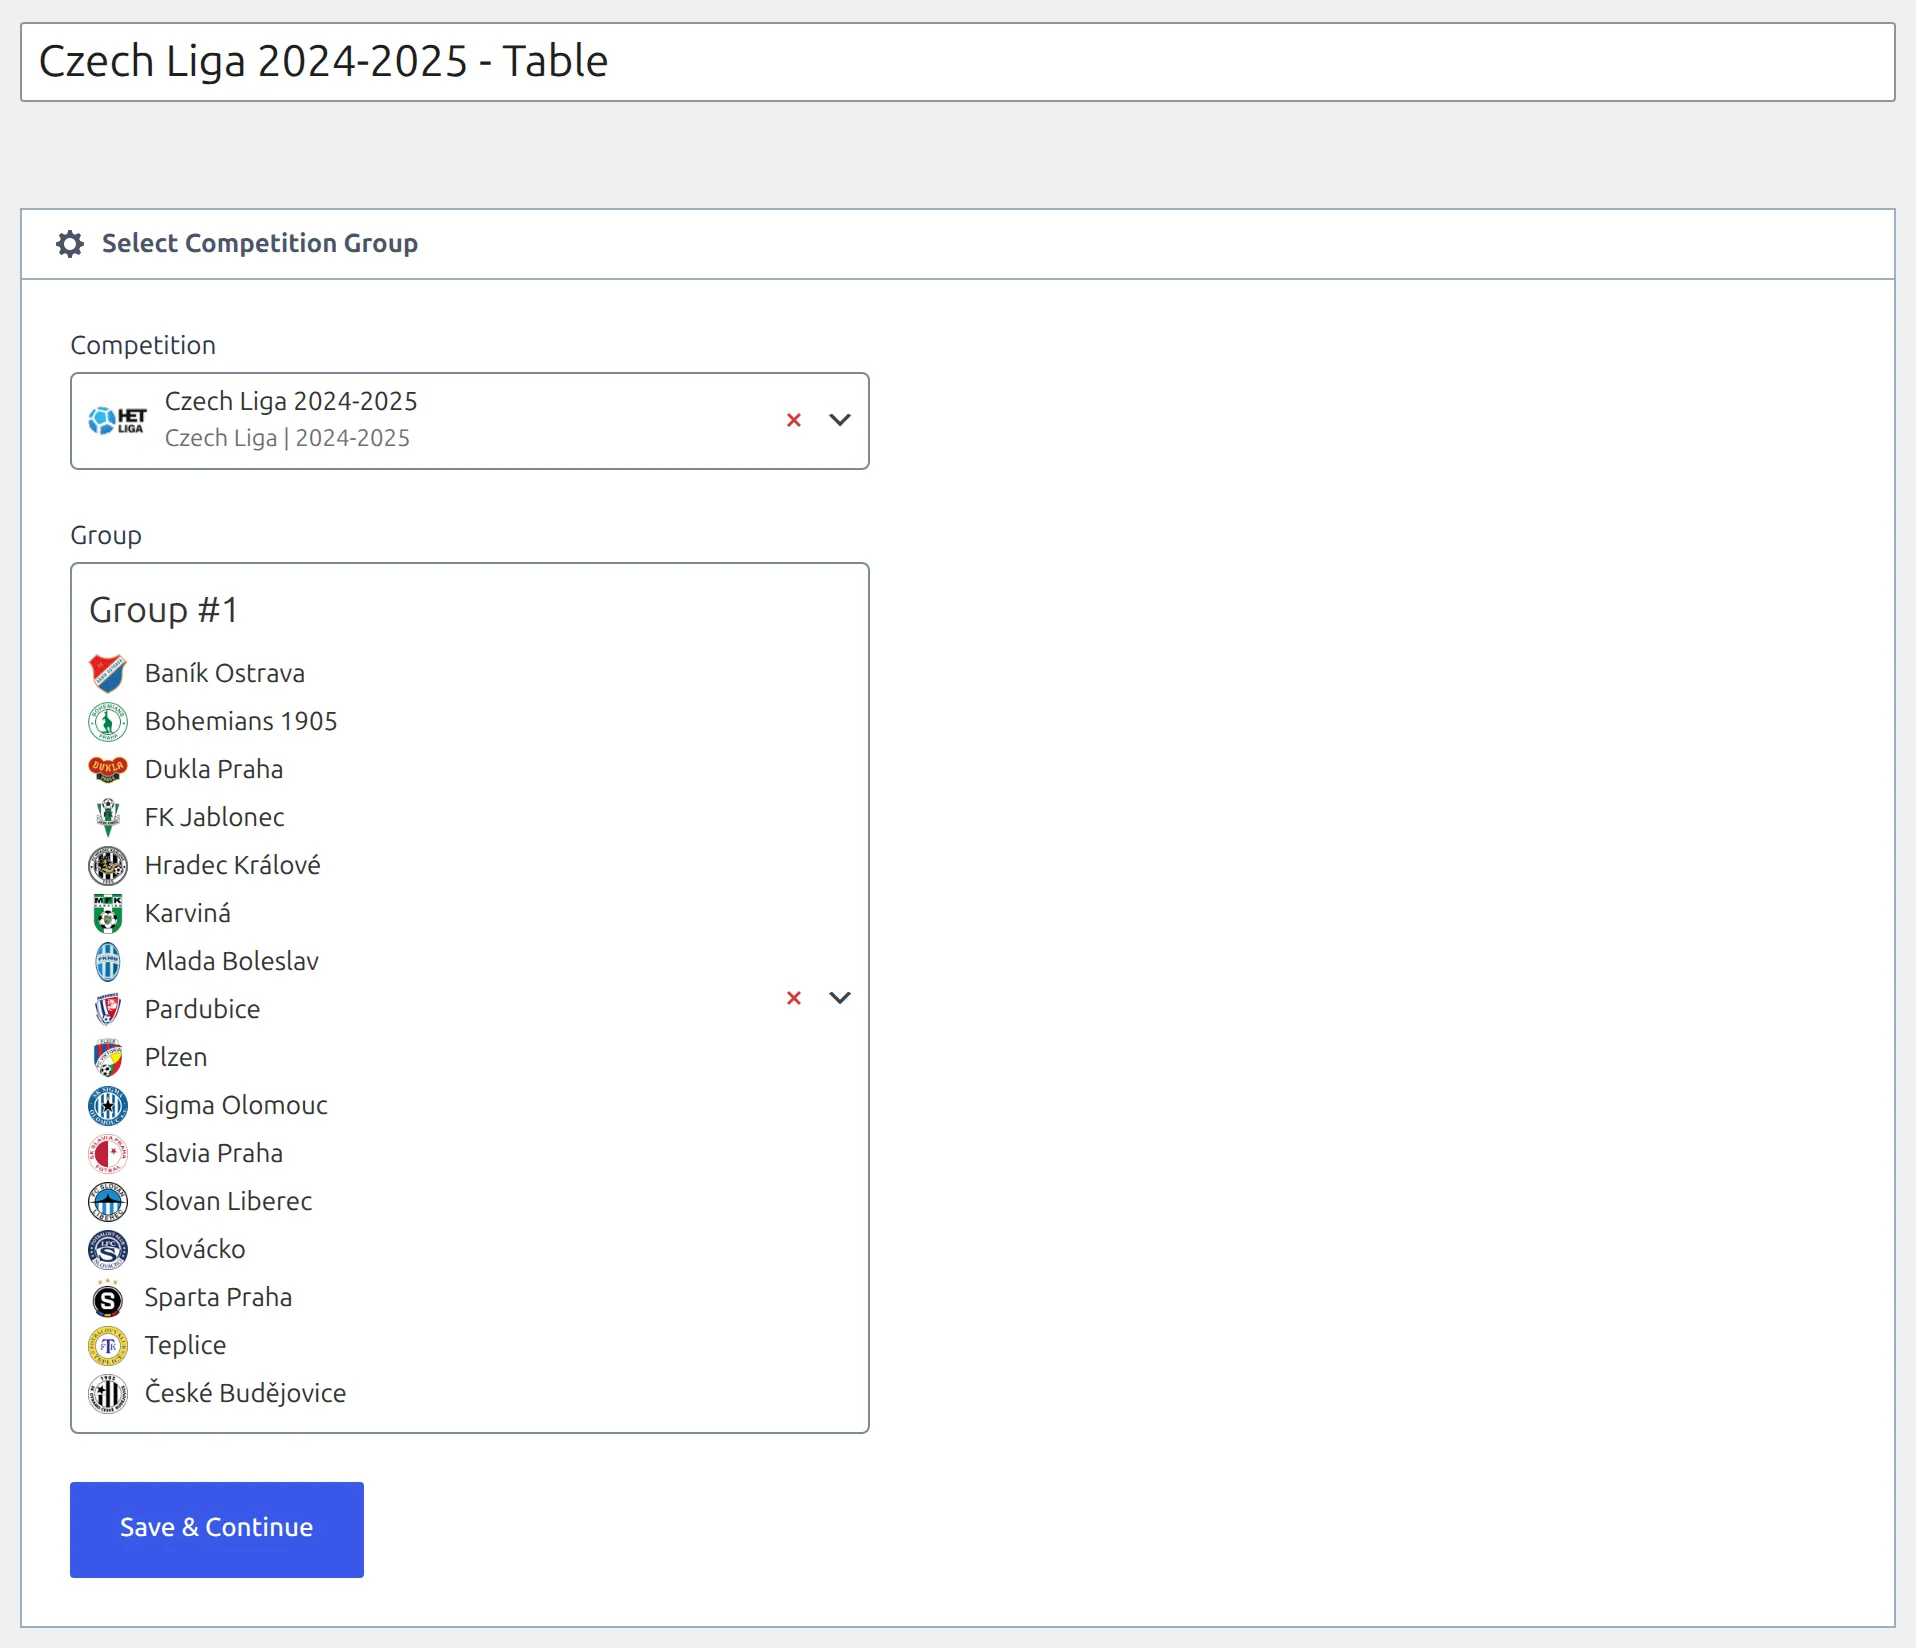
The club list is pulled from the group you chose. On the next screen you can set Initial points, row colors and the Ranking Rules that decide how ties are broken.
Step 5. Add players
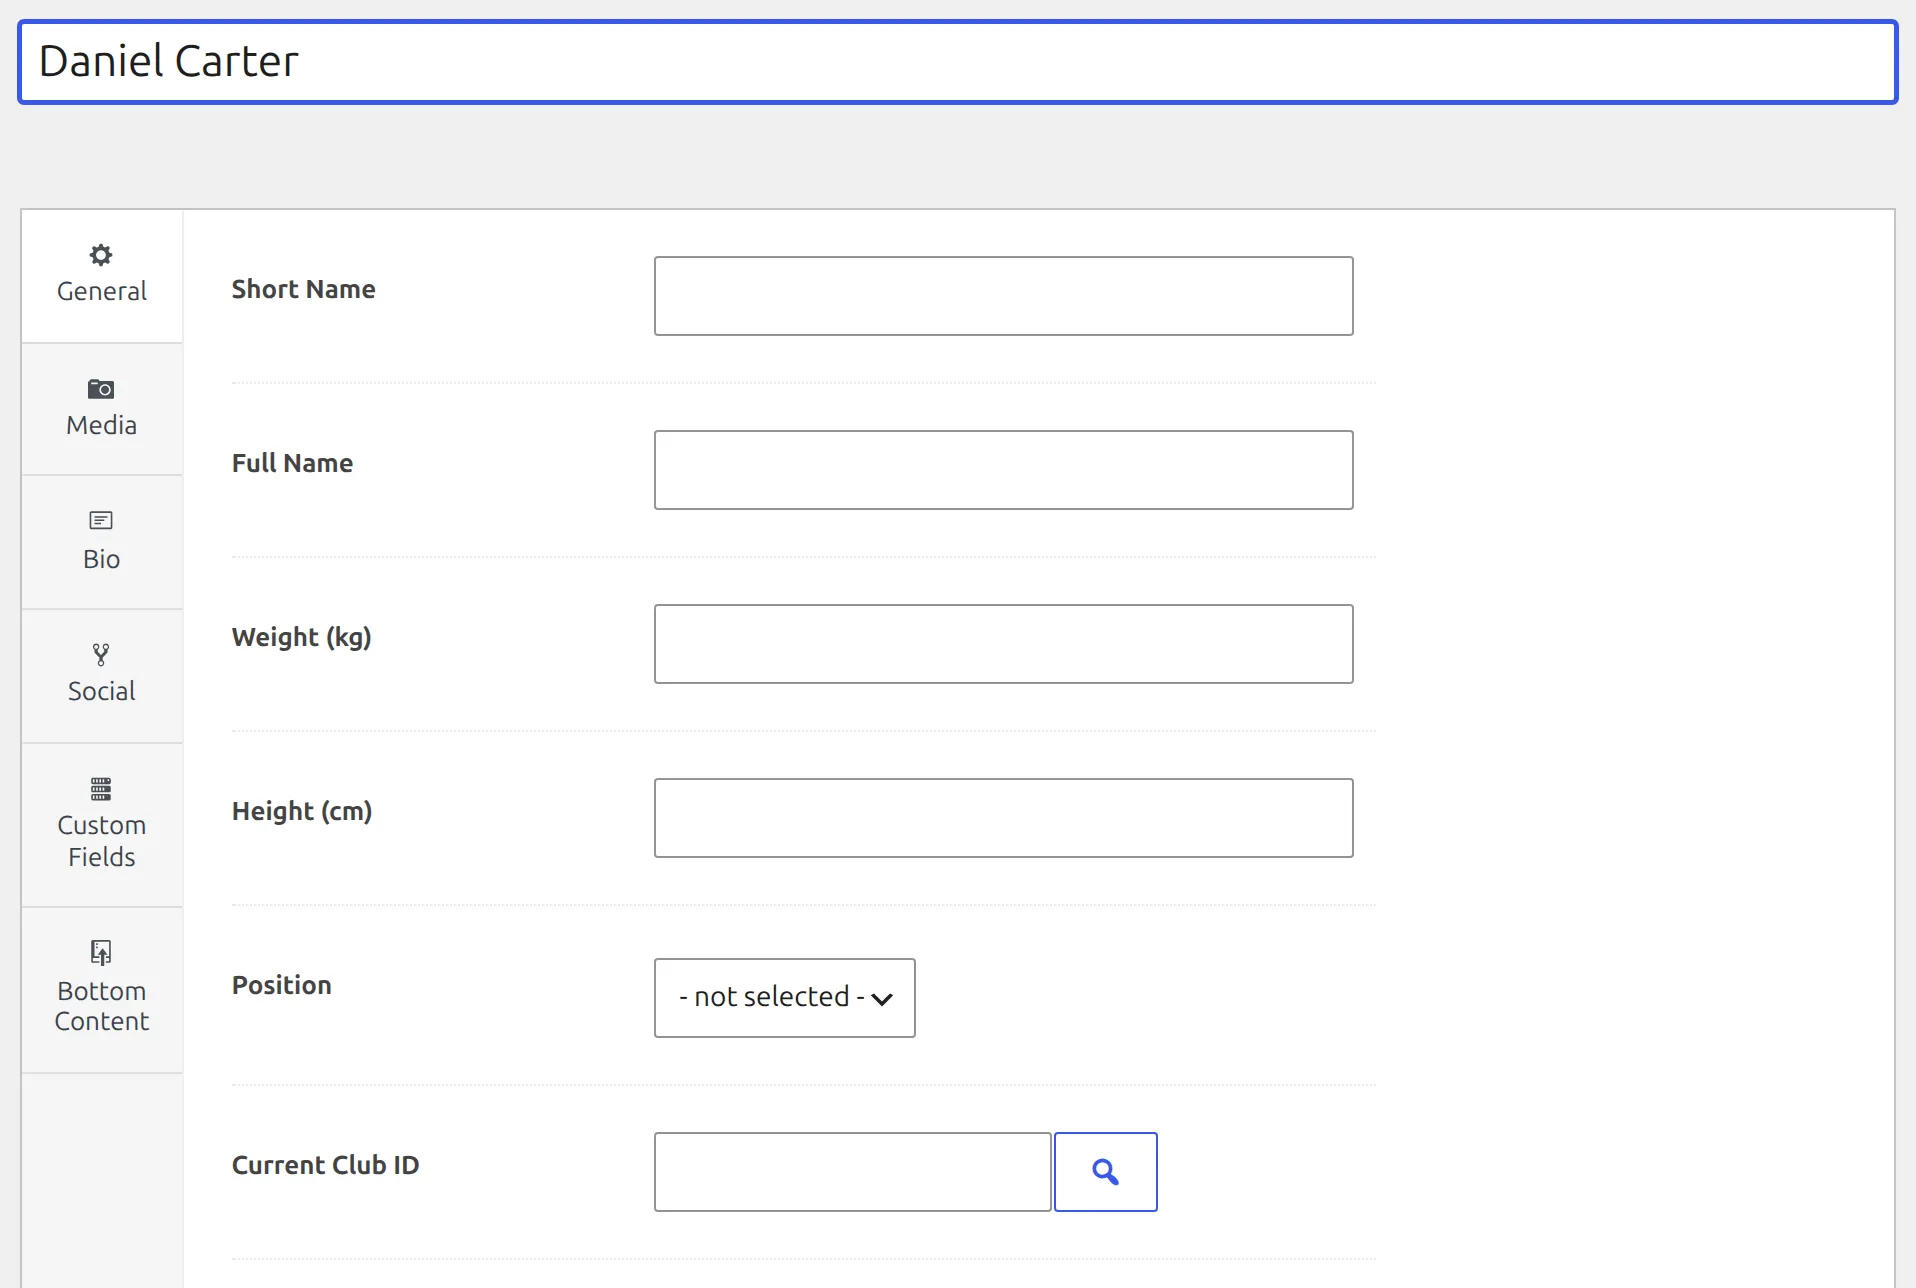
Go to Clubs & People → Players and click Add New Player, or paste a list into Settings & Tools → Data Import. Setting each player’s Current Club ID now makes the next step much quicker.
Step 6. Fill the club squads
Creating a player doesn’t put them in a team. Open a club from Clubs & People → Clubs and click Squad in the left sidebar.
The squad opens on the Active Squad tab. That’s the canonical roster – the one shortcodes use unless you ask for a specific season.
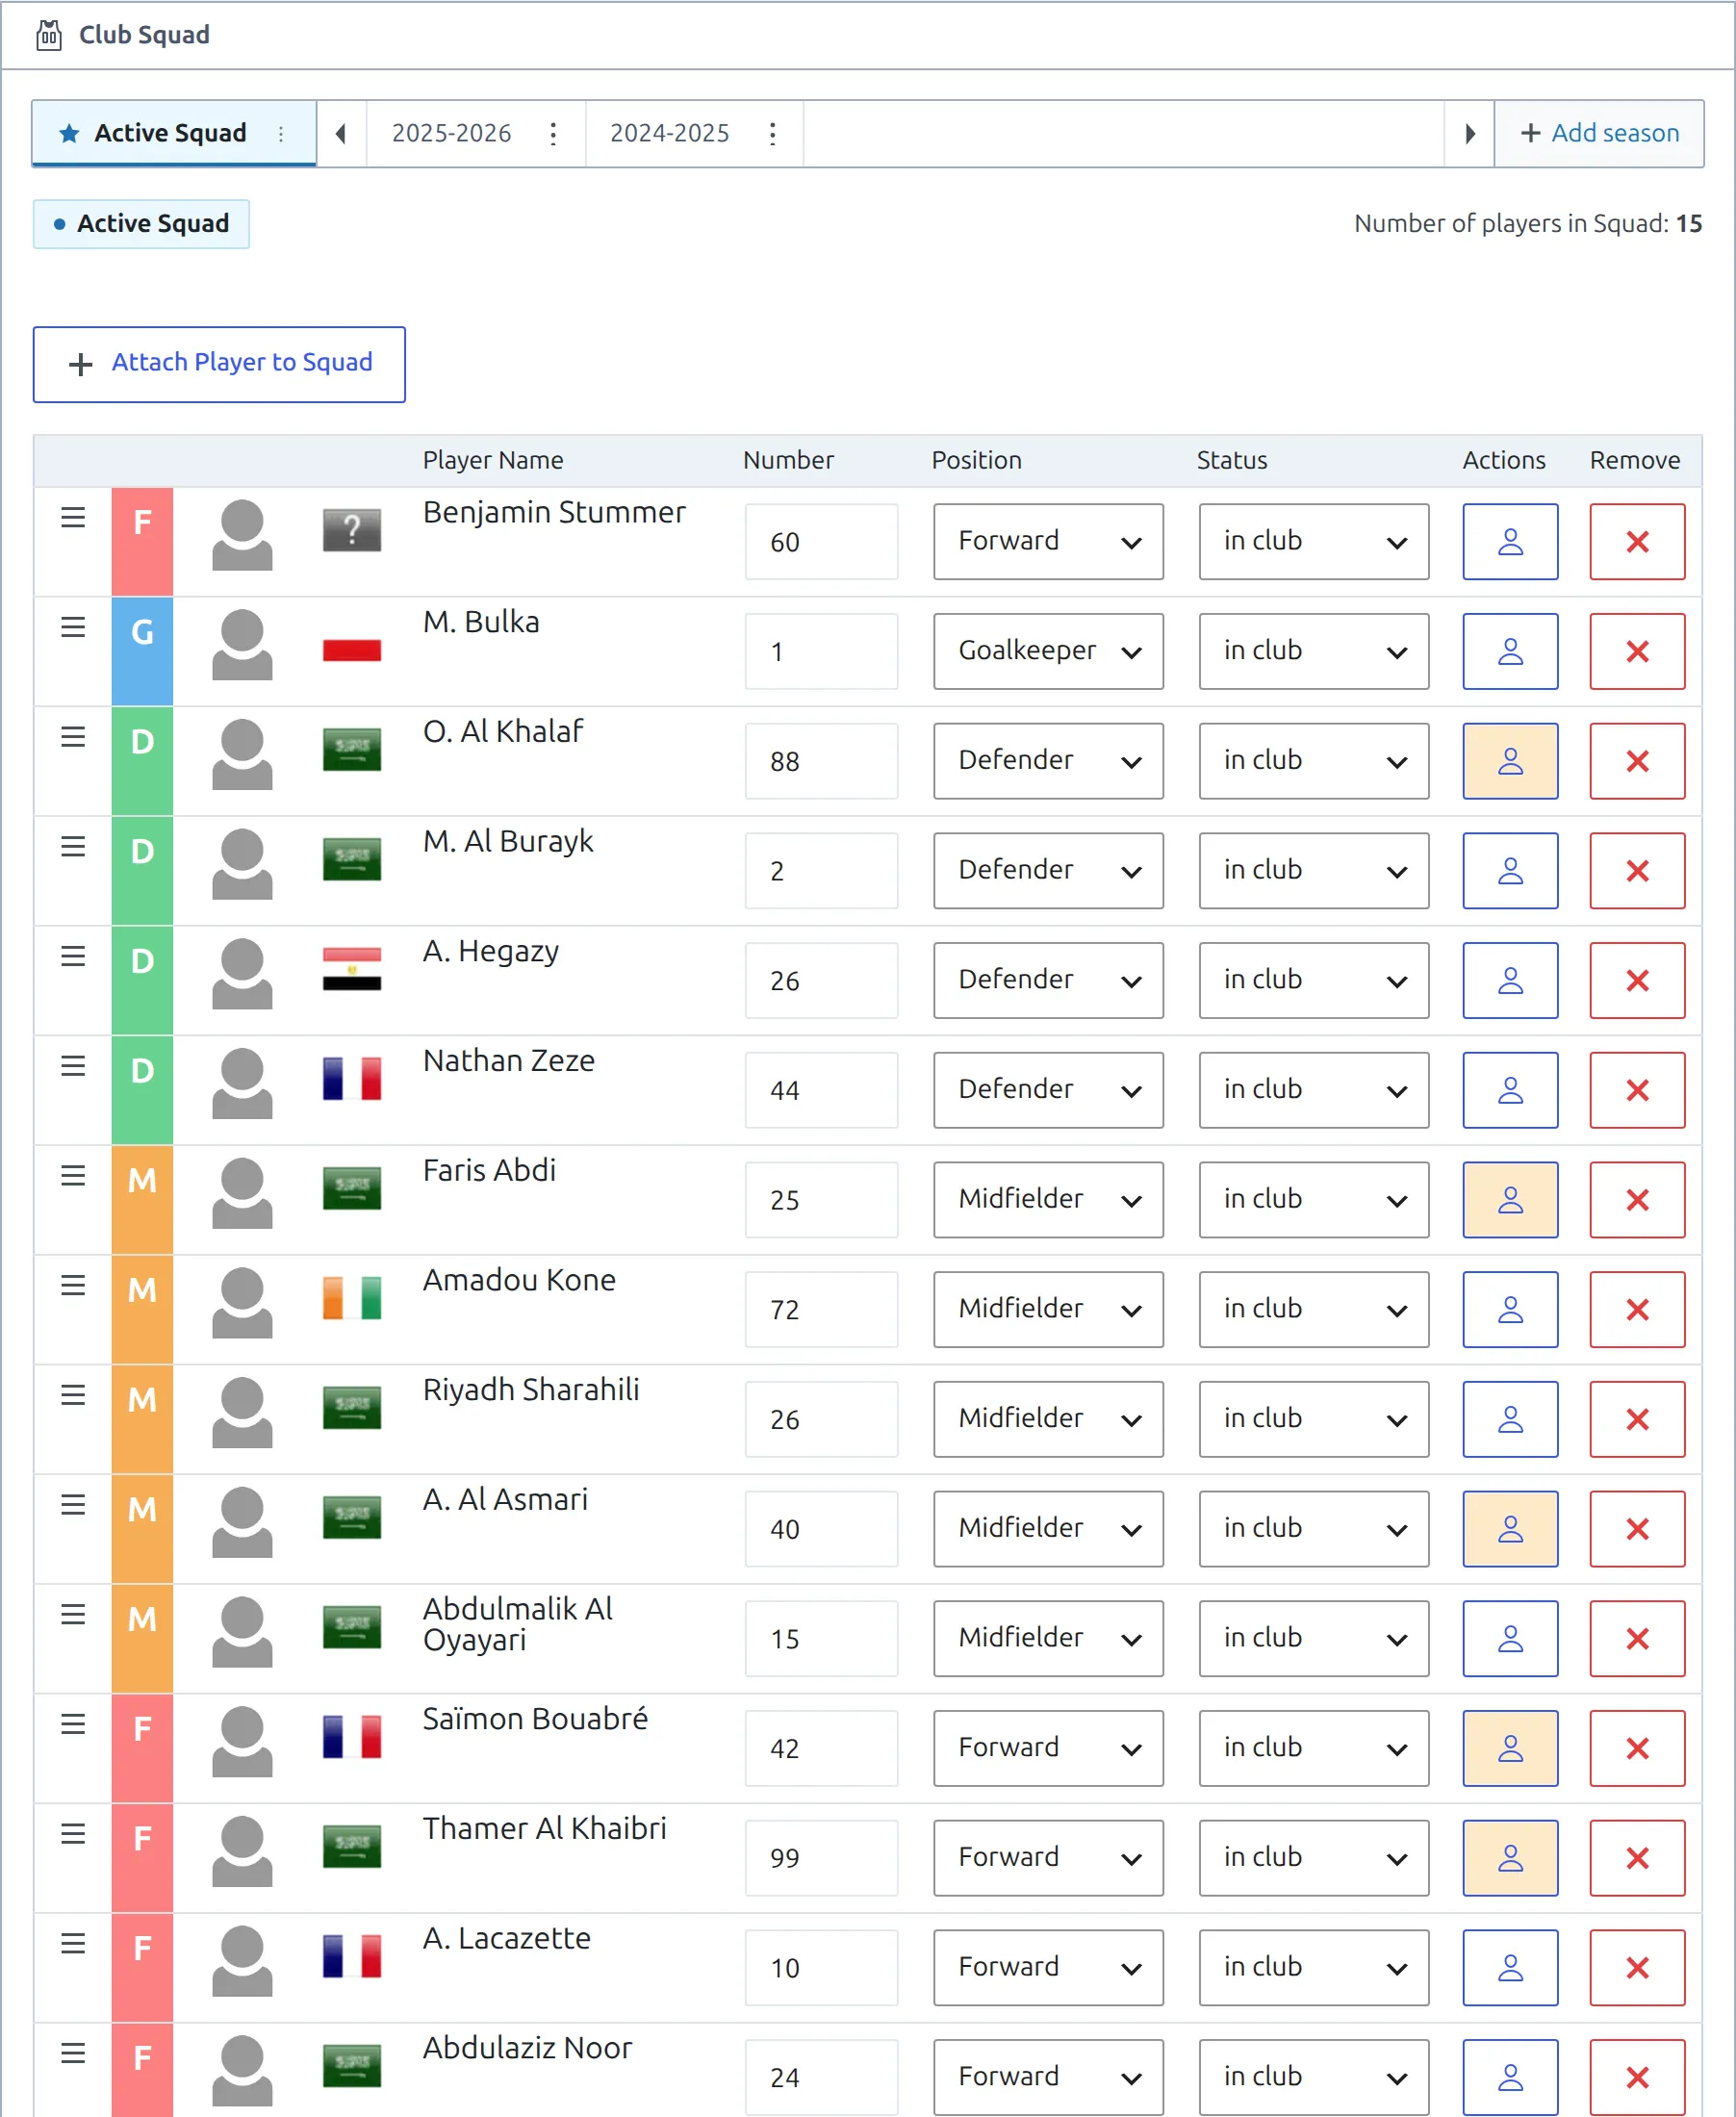
- Click Attach Player to Squad.
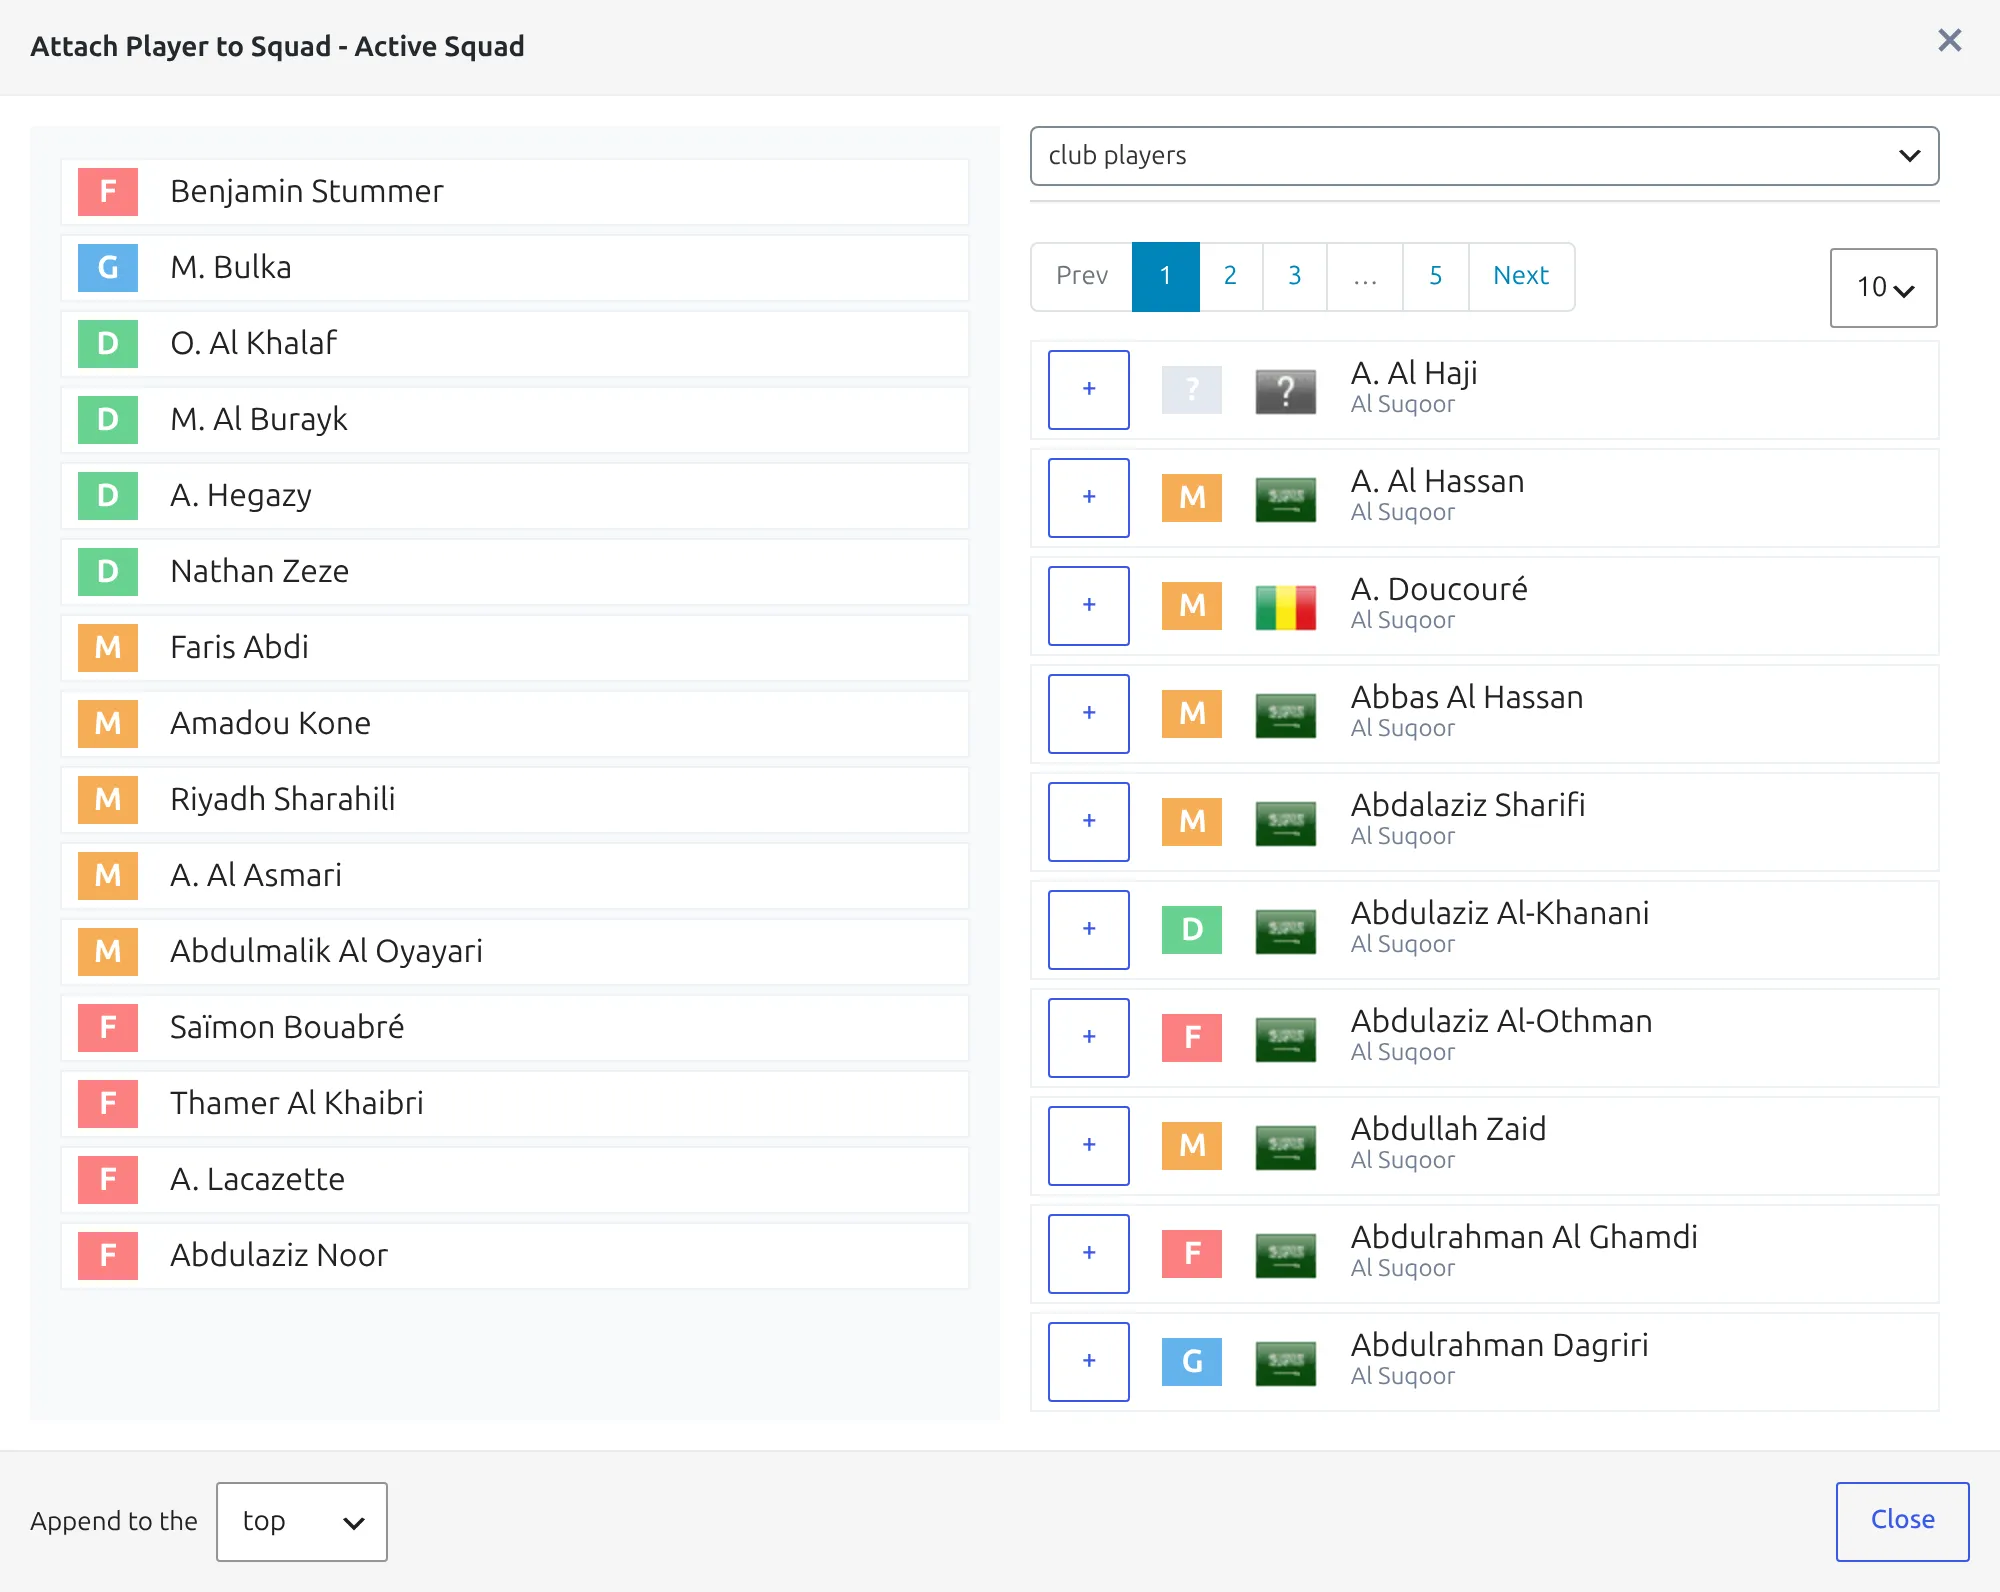
- The picker opens on club players – only players whose current club is this one. Switch the dropdown to search by name to reach anyone else.
- Click + next to each player. Append to the at the bottom of the modal controls whether they land at the top or bottom.
- Click Close.
In the table itself, drag the grip handle to reorder, and set each player’s Number, Position and Status. The four built-in statuses are in club, on loan, left club and on trial.
Press Save. Squad changes are saved with the club, not on their own.
Keeping a roster for a past season is a separate job – use + Add season on the tab strip. Club Squad covers seasons, staff and grouping in full.
Step 7. Create your first match
Go to Competitions → Matches and click Add New Match. Matches are created in two passes.
The first screen is the Match Setup section of the Match Data box. Four things are required, and Save & Continue stays grayed out until all of them are set:
- Competition
- Season – fills in automatically once you pick the competition
- Home Club
- Away Club
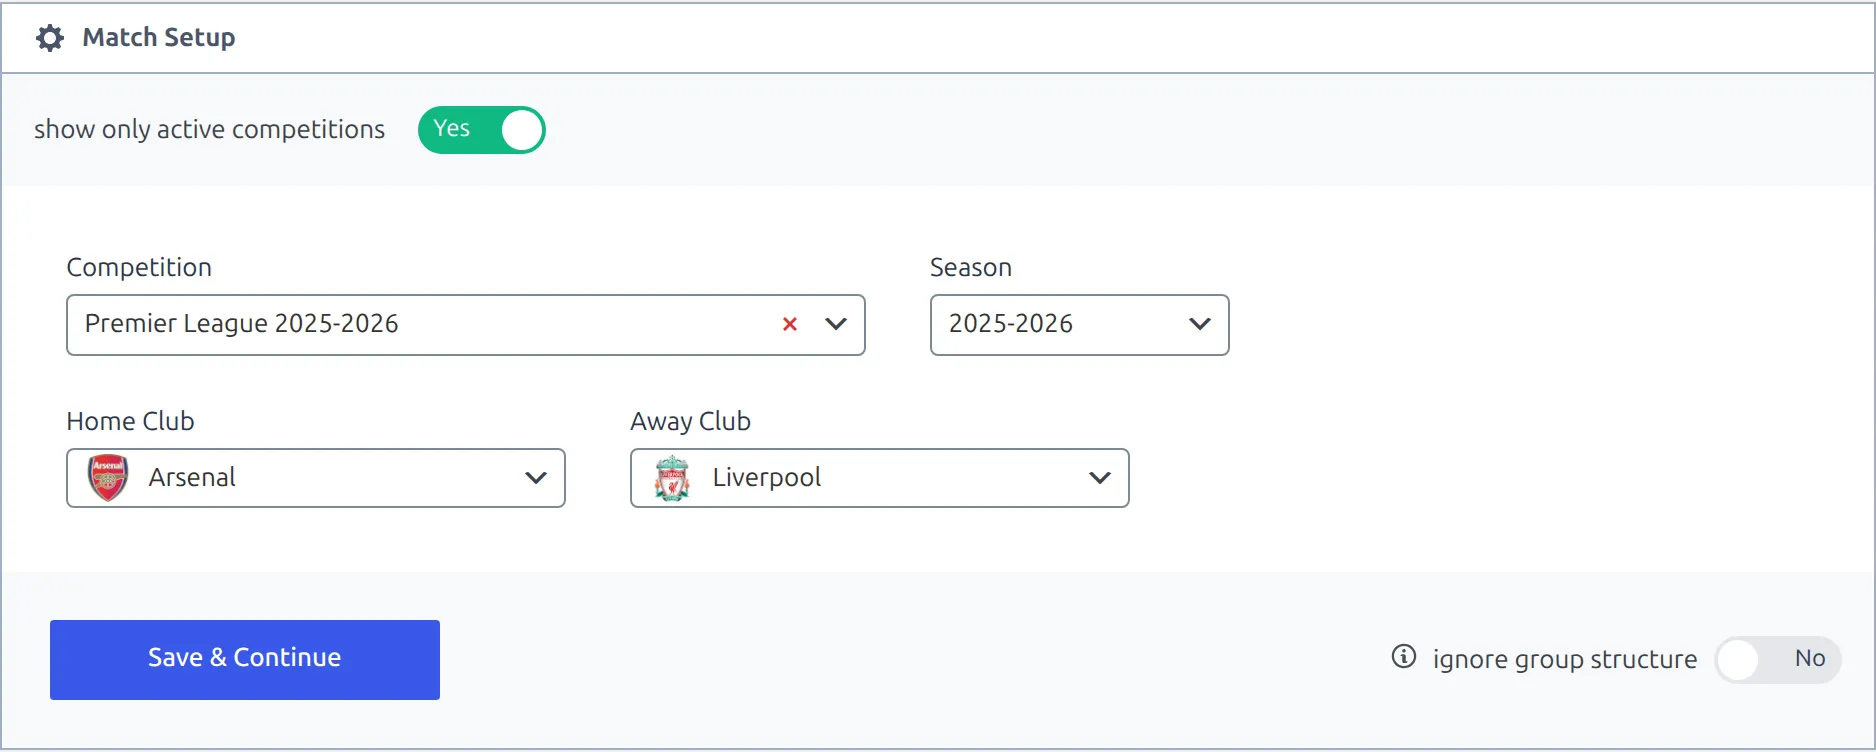
The Competition list starts filtered by show only active competitions, and the club lists are drawn from the competition’s group structure, so only clubs you assigned in step 3 appear. In a knockout competition a Round dropdown appears too. It picks the first round for you – change it to reach the clubs in later rounds.
Click Save & Continue. The page reloads into the full match editor, where you set the kick-off date and time, the score, events, lineups and the rest. There’s no title field – the match title is built from the two club names.
To enter the score, set Status in Basic Info to Result. The Final Score and Half Time boxes in Match Stats only appear for a result, and adding goal events doesn’t fill them in.
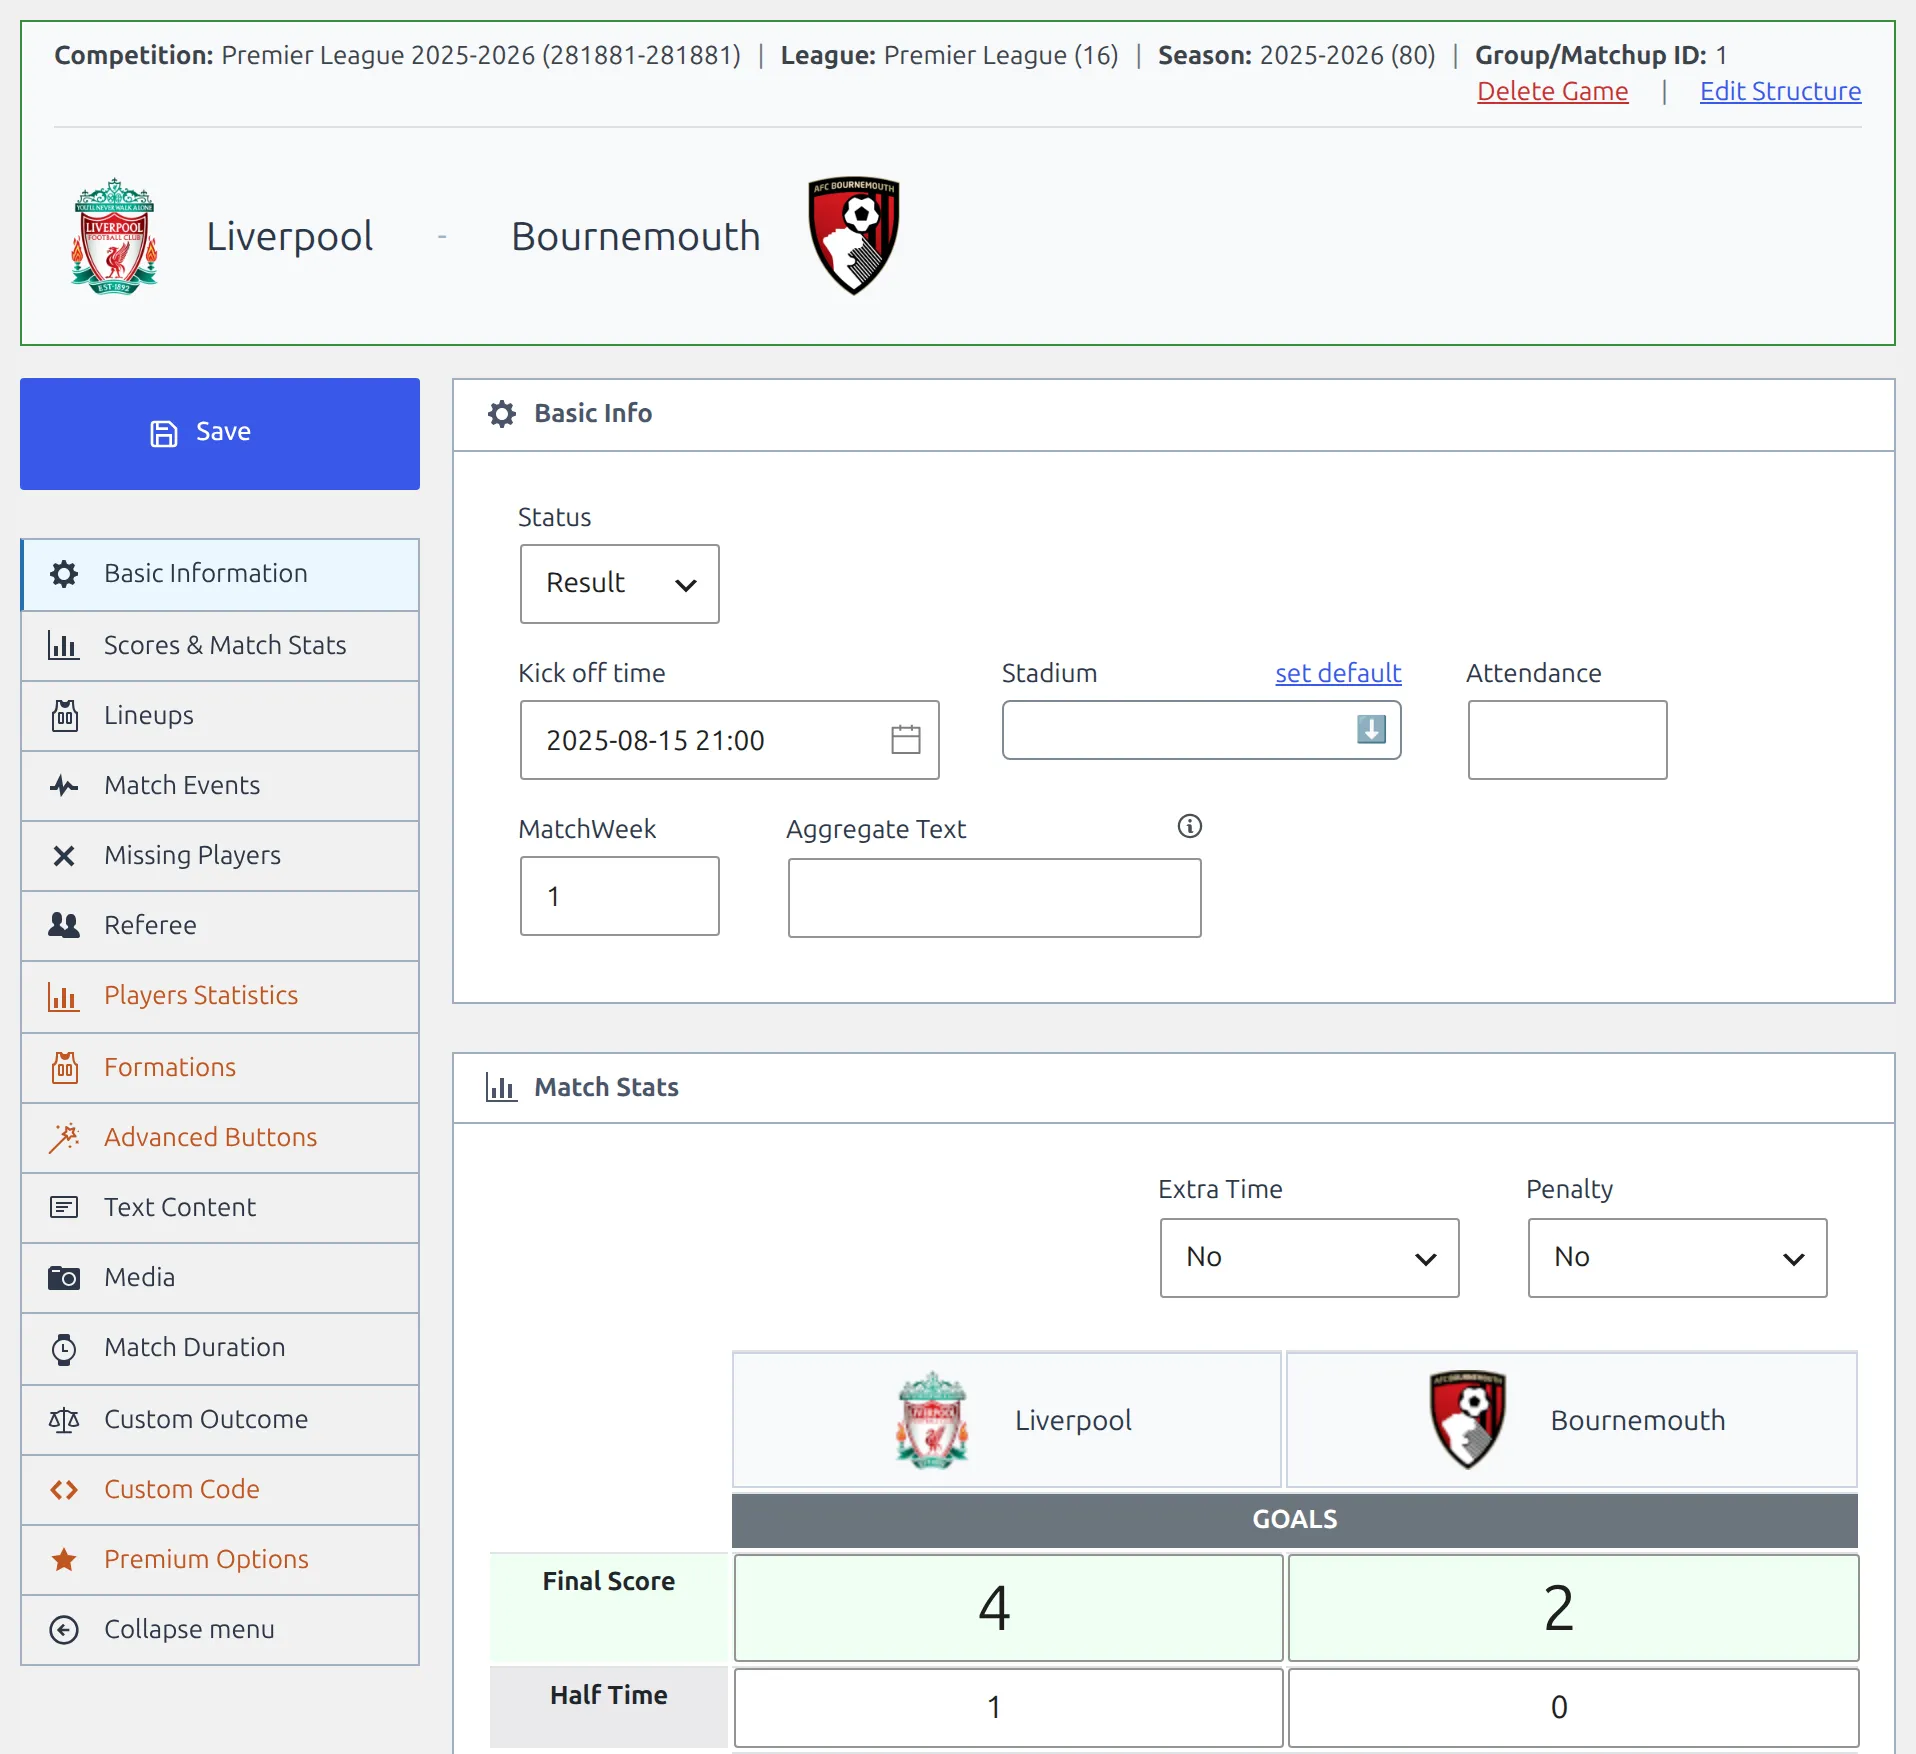
To change the competition, season or clubs later, use the Edit Structure link at the top of the match editor – it opens Match Setup again in a new tab.
🆘 If something’s missing
The Competition dropdown on Add New Match is empty
show only active competitions is on by default and lists only competitions in the active season. Switch it to No to see every competition, or fix the Active Season setting from step 1.
“Please, create a Competition first.”
The match screen has nothing to attach a match to. Finish step 3.
“Please, create a season first.”
Shown in a Club Squad box instead of the whole club editor – no General, Media or Squad sections until at least one season exists. Finish step 1.
A club is missing from the match dropdown
The list only offers clubs assigned to a group in that competition. Either add the club to a group (step 3), or switch on ignore group structure on the setup screen to see every club – not recommended, because the match then sits outside the group it should belong to.
A “Data Migration Required” panel instead of an editor
The site was upgraded from an older version and its data hasn’t been converted yet. Editing stays disabled until it is. Click Database Updater in that panel – or go to Football Leagues → Toolbox – and run the migration.
Common questions
Do I have to add every match by hand?
No. Settings & Tools → Data Import has a games (insert) type for a pasted fixture list – see Data Import Tool. PRO adds Import Matches and FL API Import, which pulls fixtures and results from api-football.com on a separate subscription (getting started). Nothing appears on its own without one of these.
How do I stop old matches piling up on a page?
Filter the Matches shortcode. For example [anwpfl-matches competition_id="123" type="fixture" sort_by_date="asc" limit="10" show_load_more="1"] shows the first 10 unplayed matches, earliest first, with a Load More button. Load More only works when limit is above 0.
Can I change how club, player and match pages look?
Those pages are built by the plugin, not as WordPress pages. On free you can reorder their sections with hooks (PHP needed). PRO has the Layout Builder for it.
📚 What’s next
Your data is in. Put it on the site with shortcodes – every shortcode is listed here, and the shortcode builder writes them for you. Most sites start with the Standing and Matches shortcodes.
- Competition: Round-Robin – league structure, formats and the standing table in depth.
- Competition: Knockout – rounds, ties and brackets.
- Competition: Multistage – a group phase and a knockout phase in one competition.