

This guide walks you through setting up your sports website with SL Kit—from installation to your first game. Follow these steps in order for the smoothest experience.
🚀 Step 1: Install SL Kit
Install and activate both plugins from your purchase. See the Installation Guide for detailed steps.
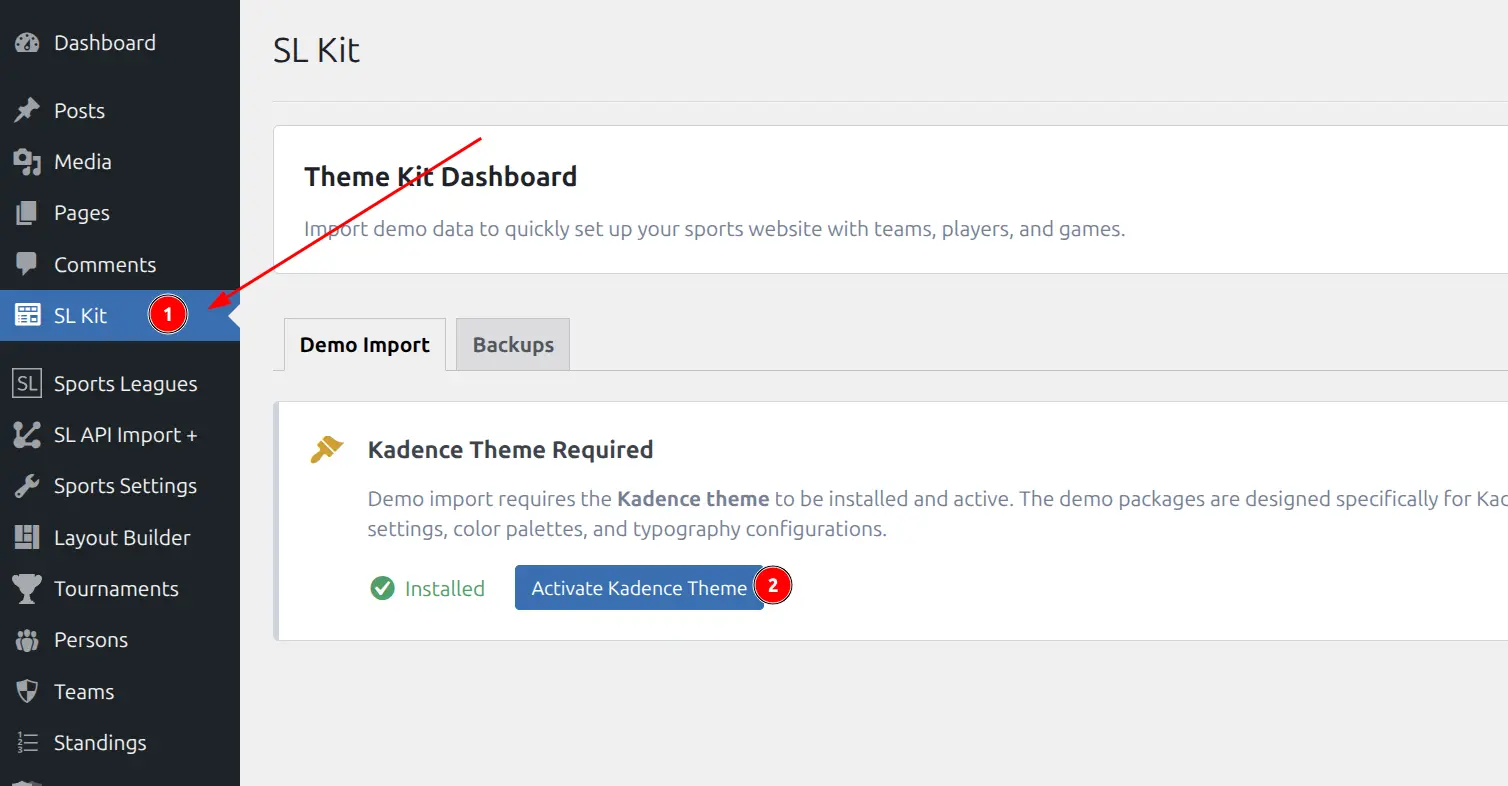
🎨 Step 2: Activate Kadence Theme and Blocks
Go to SL Kit in your WordPress admin menu. If Kadence theme is not active, you’ll see setup cards to install and activate it.
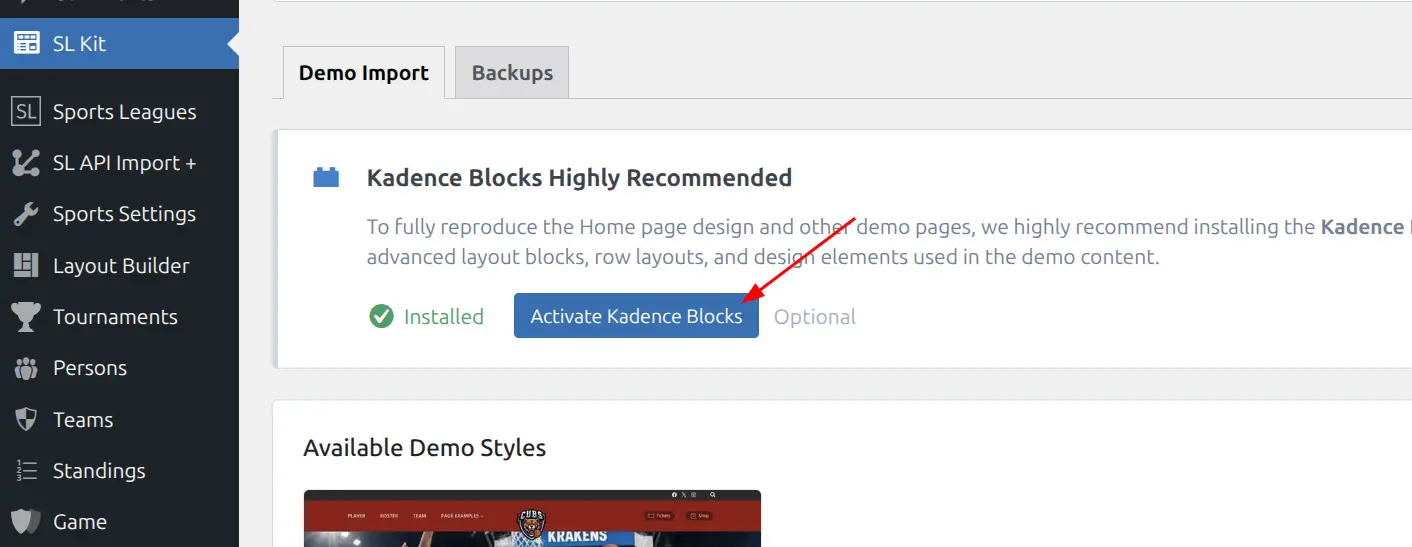
After activating the theme, you’ll see a card for Kadence Blocks plugin. Install and activate it too—this is required for the demo page layouts to work properly.
📦 Step 3: Import Demo Content
Once Kadence is active, select a demo style and choose what to import.
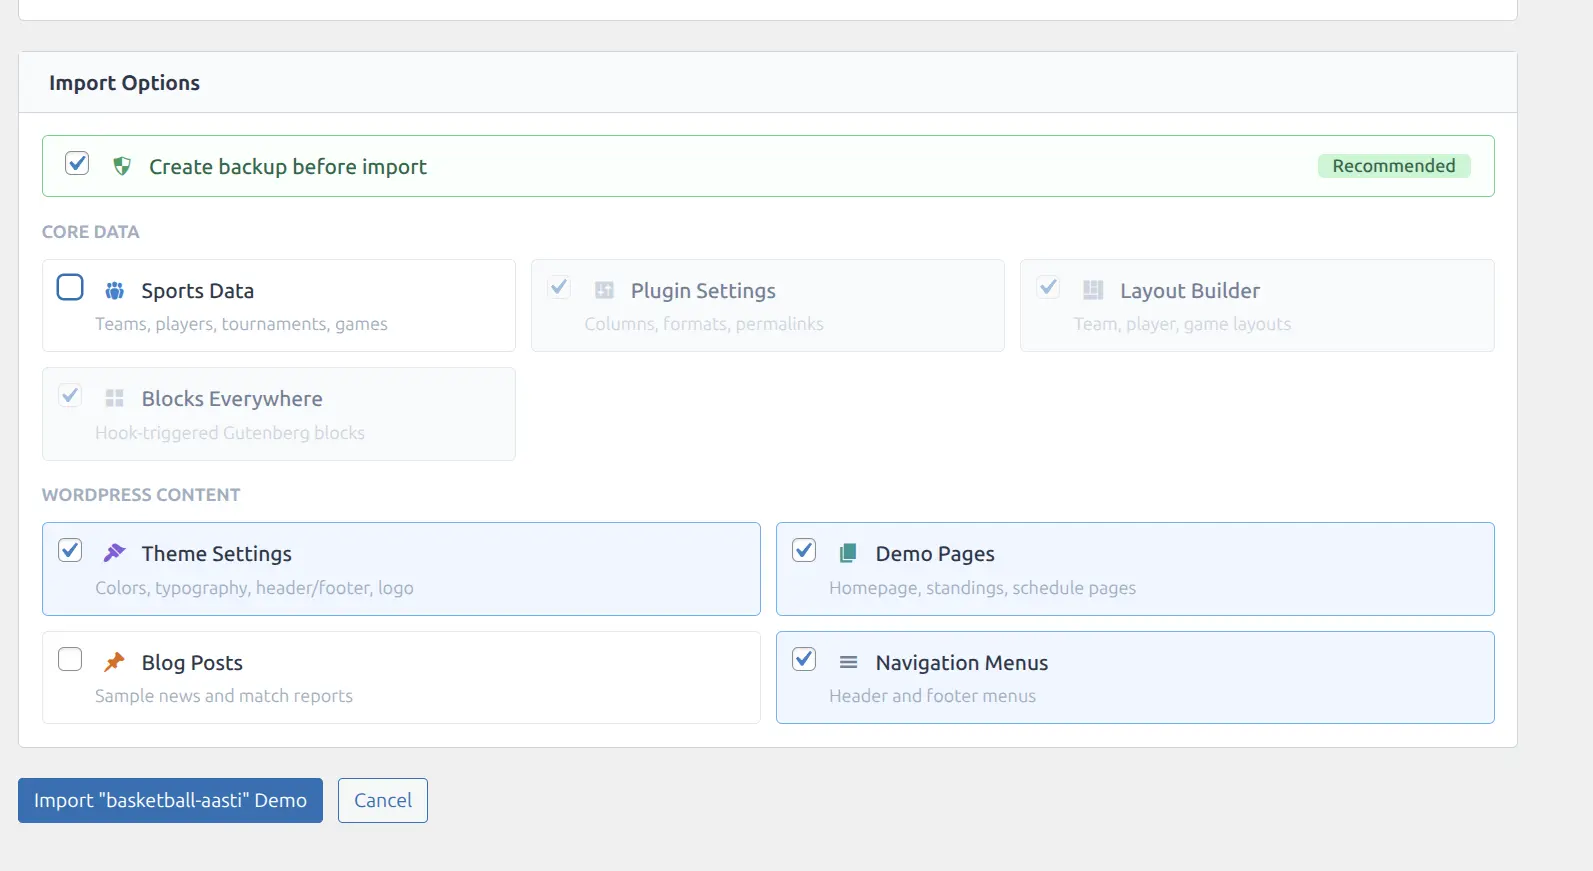
What to Import?
You have two options:
Option A: Import everything (recommended for testing)
Select all options including Sports Data. This gives you sample teams, players, and games to explore how the site works. After testing, remove the sports data before adding your real content.
Option B: Skip Sports Data (recommended for production)
Uncheck Sports Data if you want to start fresh with your own teams and players. You still get all the page layouts, theme settings, and menus.
Tip
For a real website, skip Sports Data from the beginning—you’ll save time by not having to remove demo content later.
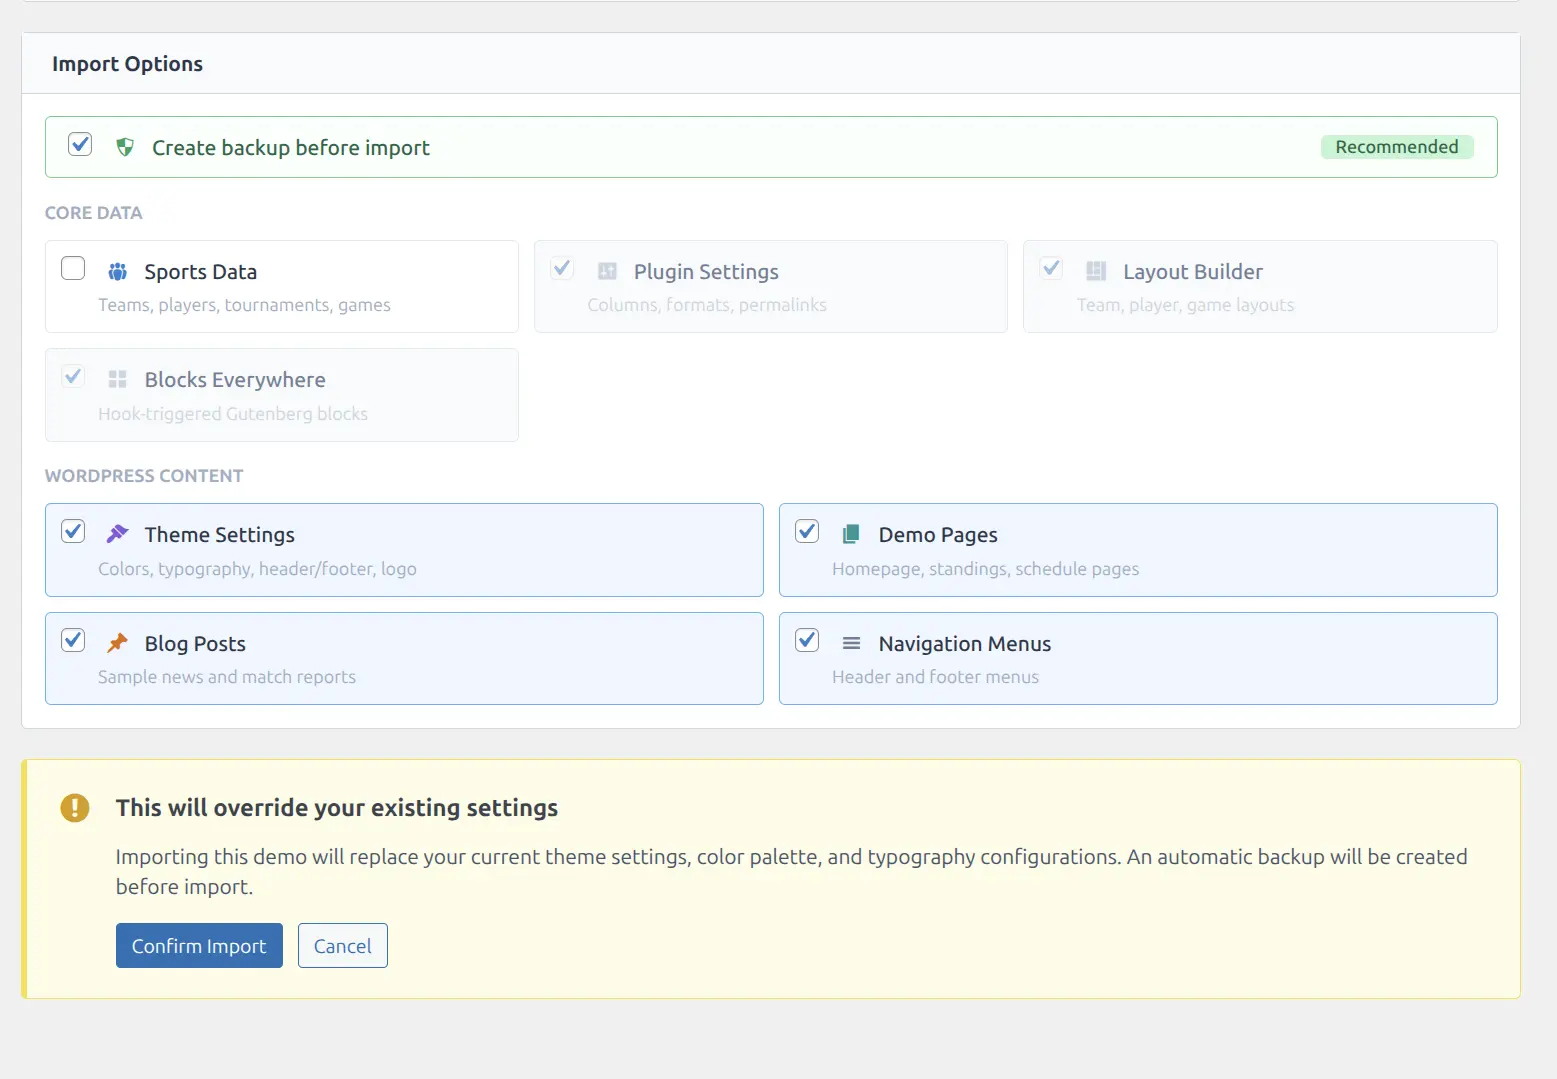
Click Import and confirm.
For full details on demo import options, backups, and removing data, see the Demo Import Guide.
Removing Demo Sports Data
If you imported everything and want to remove the demo sports data after testing:
- Go to SL Kit → Demo Import
- Find the imported demo in Imported Demos section
- Click Select Items
- Check only Sports Data
- Click Remove
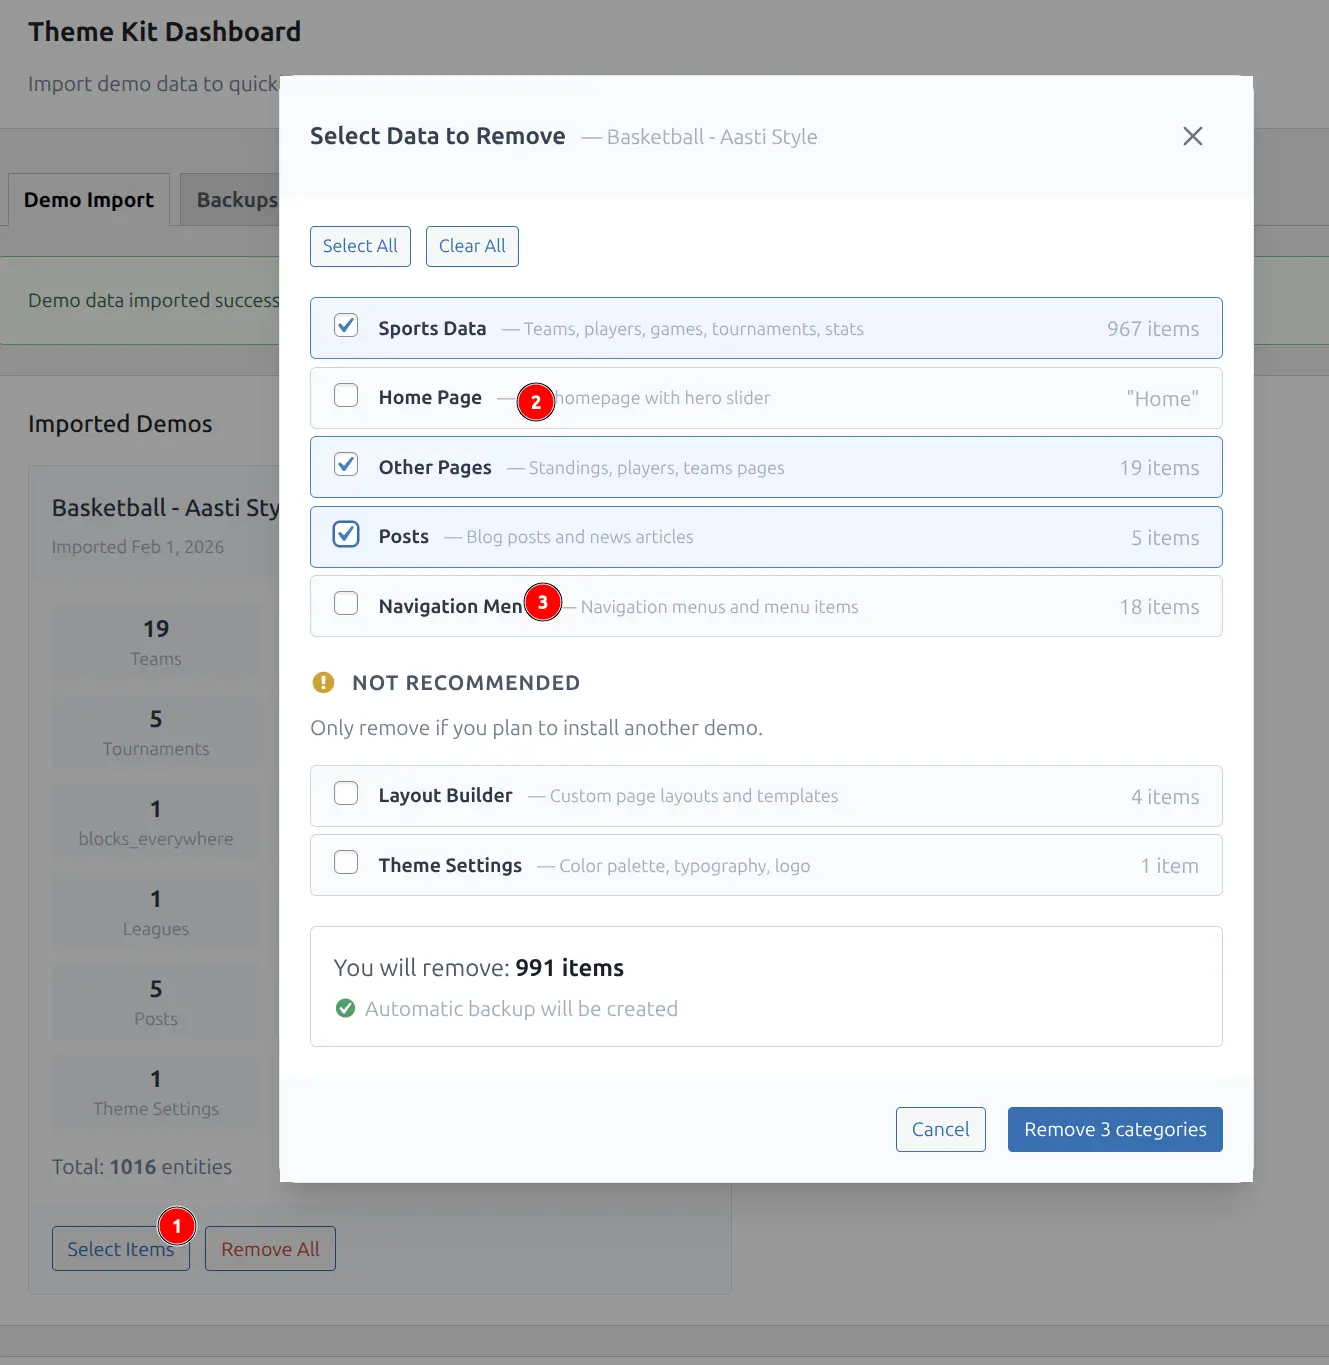
This removes only the demo teams, players, and games while keeping your page layouts, theme settings, and menus intact.
📊 Step 4: Set Up Your Sports Data
Now create your actual sports data. Follow this order for best results:
4.1 Create a Season and League
Seasons and leagues organize your tournaments. You need at least one of each before creating a tournament.
- Go to Sports Leagues → Seasons
- Add a season (e.g., “2024-25”)
- Go to Sports Leagues → Leagues
- Add a league (e.g., “Regional League” or your league name)
See Seasons & Leagues for details.
4.2 Add Teams
Create your team and the opponent teams.
- Go to Teams & People → Add Team
- Add your team with full details (logo, colors, etc.)
- Add opponent teams—but set them to Hidden status
Single-Team Website Tip
Running a site for just your club? Set opponent teams to Hidden status. They’ll appear in games and standings but won’t have dedicated pages. See Hiding Teams and Players.
See Teams for details.
4.3 Create Players for Your Team
Add your team’s players and assign them to your team’s roster.
- Go to Teams & People → Add Player
- Fill in player details (name, photo, position, number)
- Save the player
- Go to your team’s edit page
- In the Roster section, add the player to the current season
For opponent players, you have two options:
- Temporary players: Add them directly in the game editor—no database entry needed
- Hidden players: Create player posts but set to Hidden status
See Players & Staff and Team Roster for details.
4.4 Create a Tournament
Tournaments contain your games. You need at least one tournament before creating games.
- Go to Sports Leagues → Tournaments
- Add a new tournament
- Select the season and league you created
- Add teams to the tournament
- Configure stages if needed (round-robin, knockout, etc.)
See Tournaments for details.
4.5 Check Game Events and Stats Settings
Before creating games, verify that event types and statistics columns match your sport.
- Game Events: Go to Sports Settings → Game Events to configure goals, assists, cards, etc.
- Player Statistics: Go to Sports Settings → Columns Builder to set up stat columns for your sport
See Game Events and Player Statistics for details.
4.6 Create a Standing Table
Create a standing to display league rankings.
- Go to Sports Leagues → Standings
- Add a new standing
- Select the tournament and stage
- Configure columns, tiebreakers, and position colors
See Standings and Standing Table for details.
🏠 Step 5: Update Your Pages and Menus
The demo import creates pages with placeholder IDs. Update them with your actual data:
Update the Homepage
- Go to Pages and edit your homepage
- Find shortcodes and blocks that reference team IDs (e.g.,
team_id="123") - Replace demo IDs with your actual team and tournament IDs
- Update any hero images or slider content
Update Navigation Menus
- Go to Appearance → Menus
- Update team links to point to your actual team pages
- Remove or update any demo-specific menu items
🎊 You’re Ready!
Your sports website is set up. Now create your first game and watch the data appear on your site.
📚 What’s Next
| Task | Documentation |
|---|---|
| Create and edit games | Games |
| Display data with shortcodes | Display Shortcodes |
| Customize block layouts | Block Patterns |
| Build custom entity pages | Blocks Everywhere |
| Explore SL Kit blocks | Blocks Reference |
| Explore premium features | Premium Features |
🆘 Need Help?
We’re here to help you build your sports website:
- Documentation: Browse the full Sports Leagues documentation
- Support: Contact our support team with questions
- Setup Service: Need hands-on help? We offer affordable premium setup services—contact support for details